A fiber termination box does not normally make a healthy link "run slowly." When a problem inside the box adds enough optical loss, the more useful symptoms are low receive power, intermittent LOS alarms, failed acceptance tests, link flapping or rising error counts. The repair starts by measuring the link-not by replacing the enclosure at random.

A termination box protects the splice, adapter and service loop, but each internal connection still has to be inspected, routed and tested correctly.
Use this order: confirm the optical symptom → inspect both connector end faces → clean only when required → measure end-to-end insertion loss → compare it with the project loss budget → use an OTDR to locate the abnormal event → inspect the box for routing, splice or sealing problems → repair and retest.
What Usually Causes High Loss Inside a Fiber Termination Box?
The box itself is only one part of the passive link. Most excess loss is introduced at a connector interface, a field splice, a stressed fiber route or an incorrect component match.
- Contaminated connector end faces: Dust, oil, residue or hard particles can block the core area, increase insertion loss and damage the opposing ferrule after mating.
- Connector not fully seated: A loose latch, damaged adapter sleeve or partially inserted plug can create an air gap and unstable optical performance.
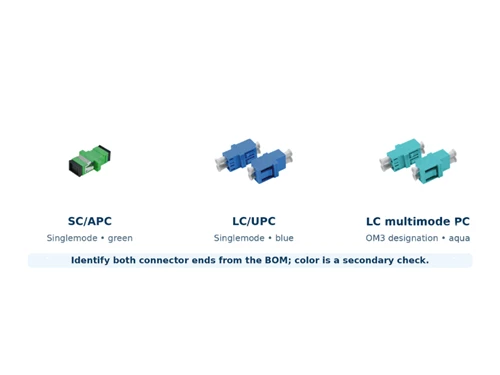
- APC and UPC mismatch: An SC/APC connector should not be mated to an SC/UPC interface. The polish geometry is different, and the mismatch can create high loss and reflectance.
- Poor fusion splice: Cleave error, contamination, core offset or a damaged protection sleeve can create a localized loss event.
- Tight bend or mechanical pressure: A fiber trapped under a splice tray, cable tie, cover or entry gland may show greater loss at longer wavelengths.
- Wrong fiber or damaged cord: A cracked pigtail, incompatible fiber type or stressed connector boot can make the box appear to be the fault when the replaceable cord is the real problem.
- Moisture and sealing failure: Water does not normally attenuate light through intact glass by simply being present in the enclosure, but it can contaminate connectors, corrode hardware, disturb fiber routing and indicate that the cable entry is no longer controlled.

Different contamination types require inspection rather than blind cleaning. Image from Glory Optical's connector-cleaning guide.
Connector inspection should follow a defined acceptance method. IEC 61300-3-35:2022 provides procedures and quantitative criteria for assessing whether a fiber-optic end face is fit for use. For a practical field sequence, see the Glory Optical fiber connector cleaning guide.
Do Not Use One Loss Number for Every Termination Box
A fiber attenuation coefficient is expressed in dB/km. A connector, splice, splitter or complete termination path is evaluated in dB. These are not interchangeable.
Basic loss-budget model:
Total link loss = fiber loss + connector loss + splice loss + splitter loss + other passive-device loss + engineering margin.
Count the actual events inside the box. A common pigtail-spliced path may include one fusion splice and one mated connector pair. A loaded distribution box may also include a PLC splitter and additional connector interfaces. The allowable result must come from the system design, project specification and test method.
For preliminary planning-not as a universal acceptance limit-the Glory Optical fiber pigtail testing guide uses approximately 0.20–0.30 dB for a mated connector pair and 0.05–0.10 dB for a fusion splice. The final link still has to remain within its calculated optical budget.
How to Troubleshoot the Link Step by Step
Step 1: Confirm That the Symptom Is Optical
Check the ONT, transceiver or active equipment before opening the box. Record receive power, LOS state, link flaps and error indicators when available. A Wi-Fi or application-performance complaint alone does not prove that the passive fiber link is faulty.
Step 2: Inspect Both Sides of Every Connection
Disconnect safely and inspect the plug and the adapter-side interface. A clean patch-cord end can be re-contaminated immediately by a dirty adapter or pigtail. Do not look into a live fiber with a direct-view microscope.
Step 3: Clean, Then Re-inspect
If the end face fails inspection, dry clean it with a connector-specific cleaner or lint-free wipe and inspect again. Use an approved wet-then-dry method only when oil or film remains. Never mate a connector simply because it has just been cleaned; the final inspection determines whether it is ready.
Step 4: Measure End-to-End Insertion Loss
Set a reference with a light source and known reference cords, test the installed link with an optical power meter or OLTS, and compare the measured value with the calculated budget. This tells you whether the complete path passes under operating-like conditions.
Step 5: Use an OTDR to Locate Excess Loss
If the end-to-end result is too high, use an OTDR to identify where the abnormal event occurs. Select an appropriate pulse width, index of refraction, wavelength and range. A launch cable is needed to evaluate the near-end connector; a receive cable helps evaluate the far-end connector.
Step 6: Inspect the Physical Layout Inside the Box
Open the enclosure only after the measurement points to this section of the route. Check the splice protector seating, adapter latch, fiber crossover, cable-tie pressure, service-loop storage, cover clearance, entry-gland grip and signs of contamination or moisture.

A clear internal layout makes it easier to isolate adapter, splice, slack-storage and cable-entry problems.
Step 7: Repair One Cause at a Time and Retest
Clean the interface, reroute the stressed fiber, replace the damaged cord, correct the polish mismatch or redo the splice. Retest after each repair so the team knows which action changed the result. Save the final OLTS reading and OTDR trace as the new baseline.
Which Test Tool Should Be Used?
OTDR and power-meter testing are complementary, not interchangeable. End-to-end insertion loss verifies whether the complete link meets the budget; OTDR testing helps locate and characterize individual events.
| Tool | Main Question | Best Use at a Termination Box |
|---|---|---|
| Fiber inspection scope | Is the end face clean and undamaged? | Inspect plugs, adapter-side interfaces and reference cords before mating or testing. |
| Light source + power meter / OLTS | Does the complete link meet its loss budget? | Acceptance testing and before/after comparison following a repair. |
| OTDR | Where is the excess-loss or reflective event? | Locate a connector, splice, bend, break or unexpected event along a sufficiently long route. |
| VFL | Is the route continuous or visibly damaged? | Short-link continuity checks, fiber identification and obvious breaks or severe bends. |
| PON power meter | Are live PON wavelengths within the required operating range? | Service troubleshooting on GPON or XGS-PON links without treating a live network like a dark-fiber test. |
The Fiber Optic Association explains that insertion-loss testing sums the contributors across the complete cable run, while an OTDR analyzes individual events. Its loss-testing guidance and OTDR reference are useful when defining a project test plan.
For field kits, Glory Optical's fiber optic tool range includes power meters and connector-cleaning supplies for FTTH, PON and general fiber maintenance.
How to Interpret Common Test Results
| Observed Result | Likely Cause | Next Action |
|---|---|---|
| High loss with a strong reflective connector event | Contamination, incomplete mating, damaged interface or polish mismatch | Inspect both sides, clean if required, confirm APC/UPC type and reseat. |
| High loss with a non-reflective event near the box | Fusion splice issue, macrobend or mechanical pressure | Inspect splice tray and routing; verify at more than one wavelength. |
| 1550 nm loss is significantly worse than 1310 nm | Possible bend-related loss or stressed fiber | Check service loops, tray edges, cable ties, doors and gland pressure. |
| Fusion splicer estimate looks good but OLTS fails | Splicer estimate is not the same as a complete link measurement | Test the full path and use OTDR from the appropriate direction to isolate the event. |
| Loss changes when the lid is closed | Fiber is being pinched or the connector boot is under load | Re-dress slack and confirm cover clearance before retesting. |
| Replacing the patch cord restores the link | Damaged cord, connector, boot or end face | Quarantine the failed cord and inspect the mating adapter before reconnecting. |
Bend resistance depends on the fiber and cable construction, not on one universal "20 mm rule." ITU-T G.657 defines bending-loss-insensitive single-mode fiber categories, but installers must still follow the cable or pigtail manufacturer's specified minimum bend radius and the enclosure's routing design.
When Should the Termination Box Be Replaced?
Do not replace the enclosure merely because the link loss is high. Repair or replace the actual component first when the fault is a dirty connector, damaged pigtail, bad splice or incorrect adapter.
Replacing the box is justified when the enclosure creates a repeatable mechanical or environmental problem, such as:
- The cover, hinge, adapter panel or splice tray is cracked or deformed.
- The enclosure does not provide enough space for the specified fiber count, splitter or service loop.
- The cable entry cannot grip the installed cable without transferring stress to the fibers.
- The sealing system no longer controls dust, insects or moisture.
- The internal routing forces fibers below the permitted bend radius.
- The project needs a different adapter type, port count, splice capacity or demarcation arrangement.
Choose the Box for the Actual Service Boundary
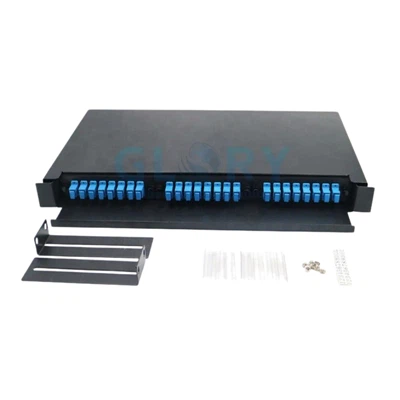
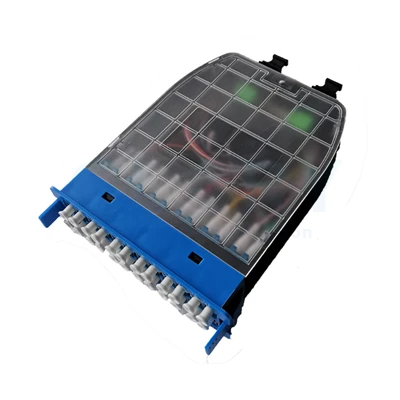
A reliable termination box should give the technician enough room to separate cable fixation, splicing, adapter mating and service-loop storage. Product selection should be based on the route and maintenance model rather than port count alone.

Outdoor Subscriber Demarcation: GL-NID01-LGX
For a service-provider handoff before the indoor cable or ONT, the GL-NID01-LGX provides an IP65 outdoor enclosure with separate cable-entry control, internal slack management and configurable simplex SC, duplex LC or MTP interface options. It is suited to wall- or pole-mounted FTTH demarcation points where technicians need a defined test and maintenance boundary.
View GL-NID01-LGX specifications →
Compact Two-Port Termination: GL-FTB-4F
For small FTTH, office or building-entry handoffs, the GL-FTB-4F supports two SC or LC adapter positions, fiber splicing and compact splitter options. A loaded configuration can reduce field assembly, but the RFQ should still define adapter polish, pigtail type, splitter ratio, cable diameter and mounting environment.
View GL-FTB-4F specifications →For more capacity and enclosure types, compare the full fiber optic termination box range or use the termination box selection guide.
Fiber Termination Box Troubleshooting FAQs
Q: Can a fiber termination box make an internet connection slow?
A: Excess loss inside the box can reduce receive power and contribute to errors, intermittent service or link failure. A general "slow internet" complaint can also come from Wi-Fi, congestion, routing or active equipment, so confirm the optical measurements before blaming the passive box.
Q: How much loss should a fiber termination box add?
A: There is no universal value for every box. Count the connector pairs, splices, splitters and fiber length in the actual path, then compare the measured insertion loss with the project budget and product specifications.
Q: Should I use an OTDR or an optical power meter first?
A: Use a light source and power meter or OLTS to verify the complete link's insertion loss. Use an OTDR when the result is too high and you need to locate the contributing event. On very short links, OTDR dead zones can limit event separation.
Q: Why is loss higher at 1550 nm than at 1310 nm?
A: A noticeable increase at 1550 nm can indicate a bend or mechanical-stress problem because longer wavelengths are generally more sensitive to macrobending. Inspect loops, tray edges, ties, doors and entry points.
Q: Should factory-new connectors still be inspected?
A: Yes. Dust caps protect connectors during handling but do not prove that the end face is clean. Inspect before mating, clean only when required, and inspect again after cleaning.
Q: What information should be included in a termination box RFQ?
A: Specify indoor or outdoor use, IP rating, mounting method, port and splice capacity, adapter type and polish, splitter requirements, cable diameter, fiber type, loaded or unloaded configuration, labeling and test-report requirements.
Conclusion
High optical loss should be treated as a measured link problem, not as a reason to replace a box blindly. Inspect the interfaces, verify end-to-end insertion loss, locate abnormal events with an OTDR, correct the physical cause and preserve the final test record. A termination box adds value when it gives technicians enough space, protection and access to keep those connection points stable over the life of the network.
For a loaded or custom configuration, send Glory Optical the port count, adapter polish, cable OD, mounting method, environmental rating and required test documentation through the project inquiry page.
Related Products

GL-NID01-LGX Fiber NID Box
Outdoor FTTH demarcation enclosure with configurable SC, LC or MTP interface options and controlled fiber storage.

GL-FTB-4F 2-Port Termination Box
Compact indoor/outdoor termination box for two SC or LC adapter positions, splicing and optional micro PLC splitter loading.