1. The 30-Second Answer
A fiber patch cable is not just a short jumper between two ports. It is the final precision interface in the optical path. If the cable is selected incorrectly, routed under pressure, mated with a contaminated connector, installed with reversed polarity, or accepted without a test record, the result may be high insertion loss, high reflectance, intermittent service or a dead link.
- Selection failure: connector type, polish, fiber type, jacket or length does not match the equipment or project environment.
- Routing failure: the patch cord is bent, crushed, over-tied, trapped by a cabinet door, or forced across multiple management trays.
- Cleaning failure: a connector is mated before inspection, allowing dust or oil to create loss and contaminate the opposite port.
- Polarity failure: LC duplex, uniboot or MPO/MTP mapping does not preserve the Tx-to-Rx path.
- Verification failure: the link is energized without VFL, insertion-loss testing, OLTS/OTDR baseline or handover records.
Correct patch cable installation is not a plug-in task. It is a failure-prevention process: plan the route, specify the cord, inspect the end-face, route without stress, confirm polarity, test the link and document the result.
2. Before Installation: Route Plan, Label Plan and Test Plan Come First
The FOA fiber optic installation reference emphasizes that a fiber job should not start until design, components, routing and documentation are settled. For patch cables, that means the installer should know the exact two ports, adapter type, polarity, label format and test requirement before the first connector is seated.
2.1 What to Confirm Before Patching
- Confirm both-end equipment, ODF, patch panel and adapter type.
- Confirm connector type, polish, fiber type, cable diameter, jacket and length.
- Prepare labels, port map, cleaning tools, inspection scope and test equipment.
- Decide whether the job requires a traffic window, baseline photo or acceptance report.
- Check cabinet door clearance, storage spool position, slack path and patch panel route before opening dust caps.
For buyers, this is where the RFQ succeeds or fails. "Fiber patch cord" is not a complete specification. A usable RFQ names connector type, polish, fiber type, cable diameter, jacket, length tolerance, label requirement and test-report requirement. Use the fiber optic patch cord page as the main product destination, then use the checklist in Section 9 to define the exact assembly.
3. Failure 1: Wrong Fiber Patch Cable Selection
The first failure happens before the cord is even installed. Many unstable links begin with a vague line item such as "SC single-mode patch cord" or "LC fiber jumper," with no polish type, fiber grade, jacket, length tolerance or test requirement.
3.1 Public Case Signal: APC and UPC Mismatch
Public installer discussions around APC and UPC mismatch show a recurring problem: many buyers specify the connector form factor but forget the polish. That is not enough for FTTH, PON or data center links where return loss and mating geometry matter.
3.2 Why It Affects the Link
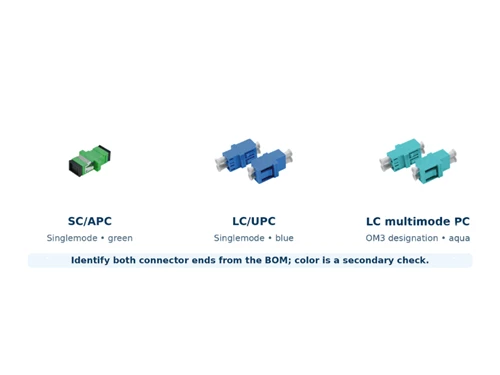
APC and UPC are not just different connector colors. UPC is a physical-contact end-face, while APC uses an angled polish to reduce back reflection. Do not mate APC directly to UPC. If the connector form factor must change, such as SC to LC, use a correct form-factor hybrid adapter only when the polish and optical design remain compatible. For connector-selection support, link users to the LC vs SC vs FC vs ST fiber connector guide.
3.3 Correct Selection Practice
| Selection Field | Recommended Check | Installation Risk If Missing |
|---|---|---|
| Connector type | LC, SC, FC, ST, MPO/MTP or hybrid form factor | Wrong adapter fit, wrong transceiver interface or forced mating |
| Polish | UPC or APC, matched end-to-end | High reflectance, high loss or ferrule damage |
| Fiber type | OS2, OM3, OM4, OM5 or G.657.A2 | Single-mode/multimode mismatch or bend-radius mismatch |
| Length | Enough for serviceable slack, not a tight pull | Connector boot stress or unmanaged cabinet slack |
| Jacket | PVC, LSZH, PU, armored or outdoor-rated | Wrong fire rating, poor UV resistance or poor routing flexibility |
4. Failure 2: Bend Radius, ODF Routing and Cable Pressure Mistakes
The classic field pattern is simple: the link works while the rack is open, then becomes unstable after the door closes. Public field write-ups and installer discussions often trace this kind of intermittent fault to deformation instead of a clean break. The cable is bent, crushed or stressed just enough to increase attenuation under movement.
4.1 Why Routing Mistakes Affect Optical Performance
A macrobend, microbend or crush point can leak optical power without fully breaking the fiber. That is why a damaged patch cable may pass a quick continuity check but fail when the cabinet door closes, a tray slides back or a bundle is re-tied.
4.2 ODF and Rack Routing Rules
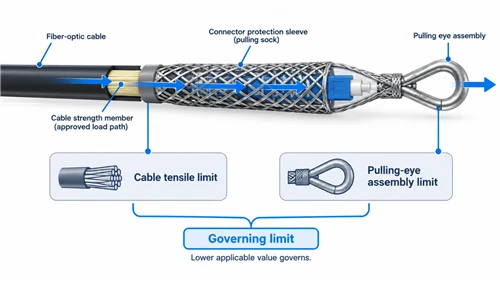
- Keep bend radius visible. A common planning rule is about 10× cable OD at rest and about 20× while under pulling tension, but the final limit must follow the cable datasheet and project specification.
- Use assigned cable managers. Route patch cords inside horizontal or vertical management channels; avoid unsupported "flying fibers."
- Do not cross multiple trays. One jumper should not wander across several fiber-management trays or storage areas.
- Manage slack on storage spools or loops. Store spare length in smooth loops that can be reworked later, not as random coils pushed into the cabinet corner.
- Use hook-and-loop ties loosely. The tie should guide the cable, not clamp it. Avoid nylon zip ties on fiber patch cords unless a project-specific method is approved.
- Check door clearance. Close the cabinet slowly during inspection and confirm the door touches air, not the patch cord or connector boot.
- Label without blocking service. Place both-end labels where technicians can read them without pulling the connector or bending the boot.
Spring-style ODF routing details are worth keeping, but they should be tied to failure prevention. The goal is not just a neat cabinet. It is a cabinet that can be closed, reopened, traced and reworked without changing the optical loss of the link.
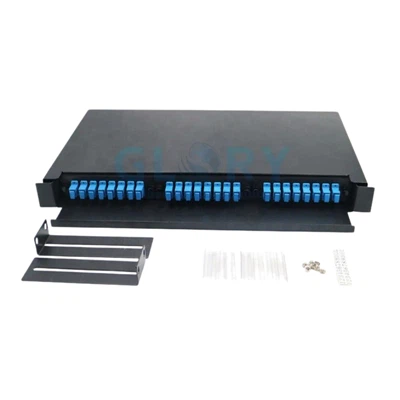
For enclosure and rack context, link to the fiber optic patch panel page or a relevant termination-box installation article. If the article discusses outside access points, link to the fiber termination box vs fiber distribution box guide.
5. Failure 3: Dirty Connector End-Faces Before Mating
Connector contamination is one of the easiest installation failures to prevent and one of the most common to ignore. A new patch cord should not be assumed clean simply because a dust cap is installed.
5.1 Authority Signal: Inspect Before Mating
Fluke's contamination and inspection guidance is clear: factory-terminated and field-terminated connectors should be inspected before mating. A dust cap protects the connector during shipping, but it is not proof that the end-face is clean. IEC 61300-3-35 is the key standard reference for inspecting and grading connector end-face contamination and defects.
5.2 Why It Affects the Link
A small particle on the core blocks light, increases insertion loss and may create back reflection. Worse, mating a dirty end-face to a clean one can contaminate both sides. One careless mating can turn one dirty interface into two suspect ports.
5.3 Correct Practice: Inspect, Clean, Inspect
- Inspect first. Use a fiber inspection scope before mating the connector.
- Clean only if needed. Use the correct one-click cleaner, cassette cleaner, lint-free wipe or approved wet-then-dry method according to the contamination type.
- Re-inspect before mating. Do not connect until the end-face passes inspection.
- Scope MPO/MTP connectors. Multi-fiber ferrules should not be judged by eye.
For this section, the best internal link is the dedicated fiber optic connector cleaning guide. Do not send "connector cleaning" anchors to a general connector-type article unless the cleaning guide is unavailable.
6. Failure 4: LC Duplex and MPO/MTP Polarity Errors
Polarity is simple in principle: the transmitter at one end must connect to the receiver at the other. In LC duplex links this may be an A/B orientation issue; in MPO/MTP links it becomes a Type A, Type B or Type C channel-design issue.
6.1 Why Polarity Errors Are Misdiagnosed
A polarity fault does not always look like an optical-loss fault. The light may be clean, the connector may be clean and the insertion loss may be acceptable, but the signal arrives at the wrong side. Cleaning and reseating will not solve a Tx-to-Tx or Rx-to-Rx mapping error.
6.2 Correct Polarity Practice
- LC duplex: confirm A/B orientation before closing the rack. Use reversible uniboot designs correctly instead of forcing the boot.
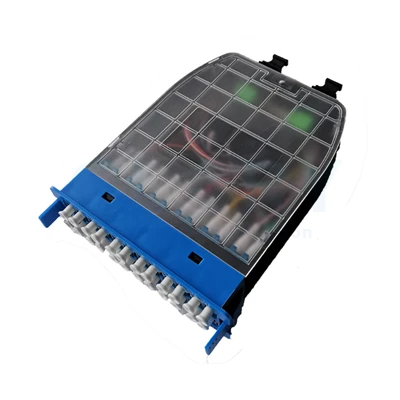
- MPO/MTP: specify polarity type, gender, fiber count and base method before ordering trunks, cassettes or fanouts.
- High-density data centers: confirm label orientation, finger access and cassette compatibility, especially when using uniboot, CS, SN or high-density LC layouts.
Use the MTP vs MPO fiber cable guide for educational support, and the MTP/MPO cable assemblies page for product conversion. For broader high-speed infrastructure context, link to data center cabling.

7. Failure 5: No Testing, No Records, No Handover
Installers increasingly face customers who ask for cable test results in a spreadsheet, not just a verbal "the light is on." This reflects how project acceptance has changed: records, labels and baseline measurements are part of the installation deliverable.
7.1 Why Testing Matters
An untested link is an unknown link. Insertion loss within budget is the evidence that cable selection, routing and cleaning worked. Without a baseline result, future troubleshooting starts from zero.
7.2 Match the Tool to the Job
| Tool | What It Confirms | What It Does Not Replace |
|---|---|---|
| VFL | Continuity and obvious breaks | Insertion-loss measurement |
| Power meter + light source | End-to-end insertion loss against the link budget | OTDR event location or connector inspection |
| OLTS | Standardized Tier 1 acceptance testing where required | Detailed event mapping along the fiber |
| OTDR | Reflectance events, breaks, anomalous loss and baseline traces | Connector end-face inspection |
7.3 Handover Package
- Port map and both-end label list.
- Insertion loss / return loss results where required.
- End-face inspection images for critical links.
- As-built photos and rack layout.
- OTDR trace for long or critical routes where the project calls for it.
For related project workflows, users can continue to the FTTH cable installation guide or the Glory fiber optic solutions page.
8. Application Matrix: Same Patch Cord, Different Installation Risks
FTTH, ODF, data center and outdoor FTTA links use similar cordage, but the dominant risk is different in each environment.
| Scenario | Dominant Risk | Internal Link Target | What to Enforce |
|---|---|---|---|
| FTTH / ONT | Crush, tight bend or dust at the wall-outlet-to-ONT jumper | fiber optic wall outlet | SC/APC where specified, smooth bend behind furniture, dust cap and no tugging. |
| ODF / telecom room | Routing, slack and labeling at scale | fiber optic patch panel | One manager per jumper, readable labels, no tray crossing and serviceable slack. |
| Data center | Polarity and end-face contamination at high density | data center cabling | LC A/B and MPO Type A/B/C confirmed, fiber type separated, end-faces scoped. |
| Outdoor / FTTA | Water, UV, tension, temperature and connector sealing | fiber optic cable assemblies | Ruggedized jacket, sealed connector, strain relief and verified tensile/bend limits. |
9. Fiber Patch Cable RFQ Checklist for Reliable Installation
Most installation failures can be prevented before production if the RFQ is specific. Use the fields below for standard patch cords, ODF jumpers, FTTH subscriber cords, data center jumpers and outdoor cable assemblies.
| RFQ Field | Required Example | Why It Matters |
|---|---|---|
| Connector | LC-LC / SC-SC / SC-LC / MPO-LC | Confirms equipment and adapter compatibility. |
| Polish | UPC / APC | Prevents APC/UPC mismatch and reflectance issues. |
| Fiber type | OS2 / OM3 / OM4 / OM5 / G.657.A2 | Avoids single-mode/multimode or bend-radius mismatch. |
| Cable diameter | 0.9 mm / 2.0 mm / 3.0 mm | Affects routing, boot clearance and cabinet density. |
| Jacket | PVC / LSZH / PU / armored / outdoor-rated | Matches fire, indoor, outdoor or FTTA requirements. |
| Length | 1 m / 2 m / 3 m / custom tolerance | Prevents tight pull and unmanaged slack. |
| Insertion loss | ≤0.3 dB, or project requirement | Defines acceptance threshold. |
| Return loss | UPC ≥50 dB / APC ≥60 dB, or project requirement | Uses positive RL notation and avoids reflectance ambiguity. |
| Polarity | A-B / A-A / MPO Type A / B / C | Prevents Tx/Rx mapping failure. |
| Labeling | Both-end label / port ID / customer code | Supports maintenance and handover. |
| Test report | 100% IL/RL test report where required | Creates incoming-inspection and project-acceptance evidence. |
| Packaging | Individual bag / OEM label / carton mark | Supports distribution and on-site identification. |
From routine RFQ reviews, common gaps include missing polish type, cable length that is too short for service slack, indoor jackets ordered for outdoor use, no test-report requirement, and unclear APC/UPC adapter compatibility. Naming the fields above closes most of those risks before production.
10. FAQ: People Also Ask
-
Q: What is the correct bend radius for a fiber patch cable?
A: A common planning rule is about 10× the cable outer diameter at rest and about 20× while pulling, but the final value should follow the cable datasheet, connector boot design and project specification.
Q: Should new fiber patch cables be cleaned before installation?
A: They should be inspected first. Clean only if inspection shows contamination, then re-inspect before mating. A dust cap is not proof that the end-face is clean.
Q: Can APC and UPC fiber connectors be connected together?
A: No. APC and UPC have different end-face geometry. Direct mating can cause high loss, reflectance and ferrule damage. Keep APC-to-APC and UPC-to-UPC unless a project design explicitly specifies a correct transition method.
Q: How do you test a fiber patch cable after installation?
A: Use VFL for continuity, power meter and light source for insertion loss, OLTS for standardized Tier 1 acceptance where required, and OTDR for longer or critical links where fault location or baseline traces are needed.
Q: What should be included in a fiber patch cable RFQ?
A: Include connector, polish, fiber type, cable diameter, jacket, length, insertion loss, return loss, polarity, labeling, packaging, test report requirement and application scenario.
Q: When should a fiber patch cord be replaced?
A: Replace it when the end-face has permanent scratches, insertion loss stays high after proper cleaning, the boot or latch is damaged, or the cord has been crushed, kinked or repeatedly causes intermittent faults.
Notes and source-use guidance: Public Reddit or social discussions should be treated as field-signal examples, not as technical standards. Technical conclusions should be supported by FOA, IEC 61300-3-35, ANSI/TIA-568.3-E, Fluke Networks, Belden or manufacturer datasheets. Always confirm bend radius, tensile load, insertion loss, return loss and certification requirements against the latest datasheet and project specification.
Core external references used in the article concept: Packet Pushers · FOA installation reference · FOA expected loss testing · ANSI/TIA-568.3-E · IEC 61300-3-35 · Fluke cleaning and inspection · Belden polarity guide.
© Ningbo Glory Optical Communication Co., Ltd. - FTTH / FTTx / 5G fiber optic manufacturer & OEM supplier.