Part 1: Why Fiber Optic Cleaning Matters More Than You Think
The Invisible Threat
In a fiber optic network, even a barely visible contaminant can disrupt an entire link. Dust, oil, or moisture on a connector end-face blocks or scatters light-causing reflection, refraction, and signal loss. The core of a single-mode fiber is only 9 microns in diameter-roughly one-tenth the thickness of a human hair. A particle of dust or a microscopic fingerprint can cover that core entirely, effectively blocking the light signal.
The numbers are sobering. Industry studies consistently show that up to 80% of fiber network failures trace back to dirty or damaged connectors. Think about that for a moment: four out of five failures could have been prevented with proper cleaning. When a contaminated connector is mated, the debris doesn't just stay on that one connector-it transfers to the mating connector, spreading contamination across the system.
Contamination and Optical Performance
The impact of contamination on optical performance is measurable and significant. A clean connector typically exhibits insertion loss around 0.08 dB and return loss around 53 dB. After contamination is introduced, insertion loss can jump to 1.84 dB while return loss plummets to 16 dB. That's a degradation of over 20 times in insertion loss and a catastrophic collapse in return loss.
Consider the physics: PC-type connectors with contaminated end-surfaces can experience insertion and return losses as severe as 8.7 dB and 27 dB respectively. A total contamination area of just 1,120 square microns-invisible to the naked eye-adds about 0.5 dB of insertion loss. Contamination directly over the fiber core is even more critical; just 44 square microns of contamination on the core can cause an insertion loss of approximately 1.6 dB.
The Hidden Costs of Dirty Connections
The consequences extend beyond technical specifications. Dirty connections lead to:
• Unexplained network slowdowns that frustrate users and require hours of troubleshooting
• Poor test readings that complicate acceptance testing and commissioning
• Intermittent data loss that is difficult to reproduce and diagnose
• Premature equipment failure as contaminants damage sensitive transceivers and adapters
• Costly truck rolls as technicians are dispatched to resolve preventable issues
For data centers, telecom providers, and enterprise networks, a single contaminated connector can mean thousands of dollars in troubleshooting and productivity loss. In mission-critical environments, the cost can be measured in millions.
Part 2: Understanding Contamination Sources
Where Contamination Comes From
Contamination enters fiber optic systems through multiple pathways:
1. Environmental Particles
Dust, pollen, and airborne debris are everywhere. In data centers, particles are generated by cooling systems, foot traffic, and equipment movement. In field environments, dirt, sand, and moisture are constant threats.
2. Human Handling
Fingerprints contain oils, salts, and acids that can etch glass surfaces over time. Even clean hands leave microscopic residues that affect signal transmission.
3. Manufacturing Residue
Even brand-new cables and connectors can carry dust or manufacturing residue from packaging. "New" does not mean "clean."
4. Repeated Mating and Demating
Every time a connector is mated and demated, dust particles from outside the critical area can accumulate and redistribute onto the connector end-face. The act of connection creates micro-wear that can generate particles.
5. Adapter and Bulkhead Contamination
Contamination in adapters or bulkheads can transfer to every connector inserted into them.
Critical Areas of Contamination
Not all contamination is equally damaging. The most critical areas are:
• The fiber core: This 9-micron (single-mode) or 50/62.5-micron (multimode) area is where the light signal travels. Contamination here is catastrophic.
• The cladding: The area immediately surrounding the core. Contamination here can cause light leakage or scattering.
• The ferrule end-face: The entire polished surface of the connector. Contamination can prevent proper physical contact between mating connectors.
Part 3: Tools of the Trade
Essential Cleaning Tools
Effective fiber optic cleaning requires specialized tools designed specifically for the task. Using inappropriate tools can cause more harm than good.
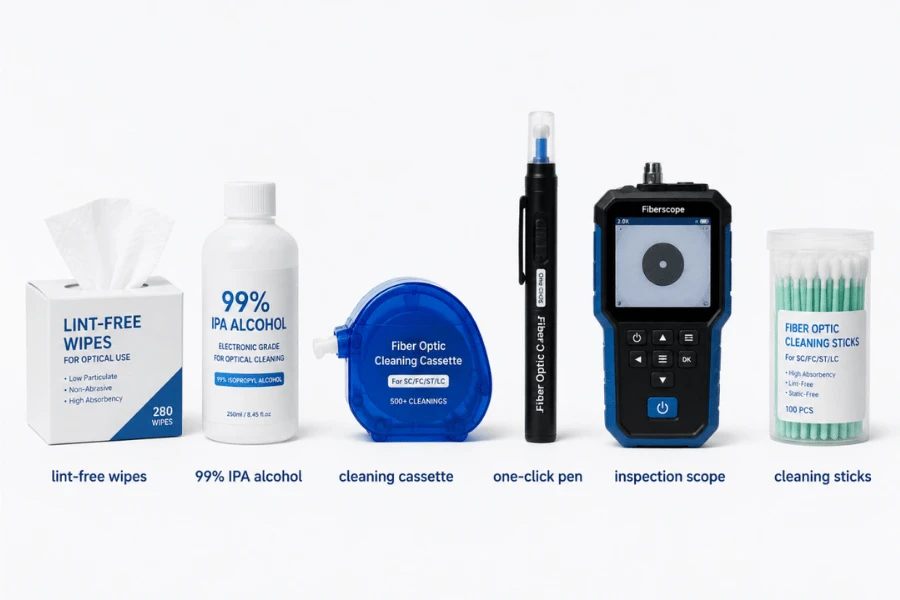
1. Lint-Free Cleaning Wipes
Lint-free wipes are the workhorse of fiber optic cleaning. These wipes are made from materials that do not shed fibers or leave residues. They can be used dry or with a cleaning solution. Never use cotton swabs, tissues, or cloth-they leave threads and fibers behind.
2. Fiber Optic Cleaning Fluid
For stubborn contamination, a cleaning fluid is essential. The industry standard is reagent-grade 99% isopropyl alcohol. Lower concentrations contain water that can leave residues. Some solvents may attack the epoxy used in connectors, so only high-purity alcohol should be used.
3. Cleaning Cassettes and Reels
Cleaning cassettes are self-contained cleaning tools that can be used dry or wet. They provide a fresh cleaning surface with each use, preventing cross-contamination. The cassette cleaner works by pressing the connector end-face against a cleaning area and dragging it in a single direction.
4. One-Click Cleaning Pens
These pen-style tools are designed for quick, repeatable cleaning of connector end-faces. They are particularly useful for hard-to-reach bulkhead applications and transceiver interfaces. A single click advances the cleaning tape, providing a fresh surface for each clean.
5. Fiber Optic Inspection Scopes (Microscopes)
Inspection is just as important as cleaning. A 200x or 400x digital inspection scope is essential for identifying contamination and verifying that cleaning has been effective. The principle is simple: inspect, clean, inspect.
6. Pressurized Air
While canned air is sometimes used, it should be approached with caution. Compressed air can blow particles around without removing them and does nothing to clean oils or residues. When used, it should be filtered, moisture-free, and applied carefully.
7. Cleaning Sticks and Swabs
For cleaning inside adapters and bulkheads, cleaning sticks are indispensable. They allow access to hard-to-reach surfaces and come in various sizes for different connector types.
Recommended Cleaning Kits
For most field and data center applications, a comprehensive cleaning kit should include:
• Lint-free wipes (multiple sizes)
• 99% isopropyl alcohol or specialized cleaning fluid
• One-click cleaning pen (1.25mm and 2.5mm versions for LC/SC connectors)
• Cleaning cassette or reel
• Inspection scope (200x or 400x)
• Cleaning sticks for adapters
• Dust caps for all connectors
Part 4: Step-by-Step Cleaning Procedures
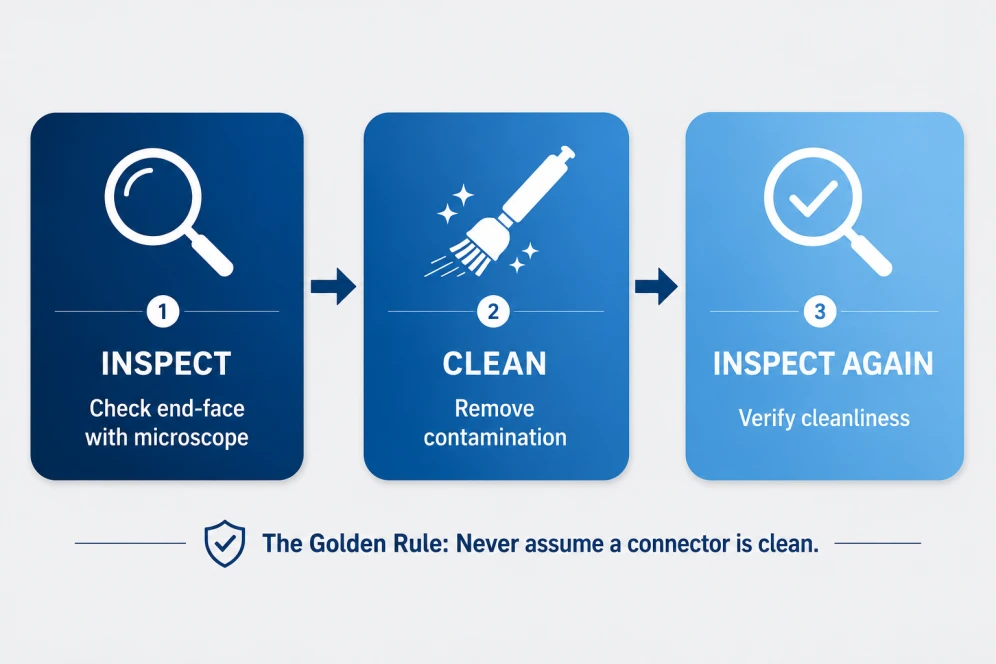
The Golden Rule: Inspect, Clean, Inspect
The fundamental principle of fiber optic cleaning is simple: inspect first, clean if necessary, then inspect again. Never assume a connector is clean. Always verify.
Dry Cleaning Method
Dry cleaning is the default approach and should be attempted first. It works well for loose particles and light contamination.
For connector end-faces using wipes:
1.Place a lint-free wipe on a flat, clean surface.
2.Hold the connector at a slight angle (approximately 90 degrees to the wipe).
3.Gently drag the connector end-face across the wipe in a single direction.
4.Inspect the end-face with a microscope.
5.Repeat if necessary.
For connector end-faces using cleaning pens or cassettes:
1.Insert the connector into the cleaning tool.
2.Activate the cleaning mechanism (click the pen or press the cassette lever).
3.Remove the connector.
4.Inspect the end-face with a microscope.
For adapter ports:
1.Insert a cleaning stick into the adapter port.
2.Rotate the stick to wipe the internal surfaces.
3.Remove and discard the stick.
4.Repeat with a fresh stick if necessary.
Wet Cleaning Method
If dry cleaning does not remove all contaminants, wet cleaning is the next step. This method is more effective for oils, fingerprints, and stubborn debris.
For connector end-faces:
1.Dampen a portion of a lint-free wipe with a small amount of isopropyl alcohol (99%). The wipe should be damp, not soaking wet.
2.Place the connector end-face into the damp area of the wipe.
3.Draw the connector into the dry area of the wipe in a single direction.
4.Immediately follow with a dry wipe to remove any residue.
5.Inspect the end-face with a microscope.
6.Repeat if contamination persists.
Important: Do not use circular motions when wiping-this can redeposit contaminants. Always wipe in a straight line from one side to the other.
Cleaning MPO/MTP Connectors
MPO/MTP connectors present unique cleaning challenges due to their multi-fiber design. Each connector contains 8, 12, or 24 fibers in a single ferrule.
Recommended approach:
1.Start with dry cleaning using a specialized MPO cleaning tool or cassette.
2.If contamination persists, apply cleaning fluid to a lint-free wipe.
3.For stubborn debris, use a fiber-stick solution designed for MPO connectors.
4.For heavily contaminated end-faces, use a solvent-based cleaning method. Apply a small amount of cleaning fluid to one corner of the MPO ferrule end-face, then wipe across in a single direction.
5.Always inspect with an MPO-compatible microscope.
Cleaning Both Connectors Before Mating
One of the most common mistakes is cleaning only one connector before mating. Both connectors should be cleaned before mating-never assume one end is clean. Contamination transfers from one connector to the other during mating.
Part 5: Best Practices for Long-Term Network Reliability
Establish a "Clean Before Connect" Policy
Every time a connector is handled, inspected, or reconnected, it should be cleaned and re-inspected before use. A "clean before connect" policy ensures contaminants aren't introduced into adapters, transceivers, or splicing equipment.
This applies to:
• New cables straight from the factory
• Cables that have been sitting unused
• Cables being reconnected after maintenance
• Cables that have been touched by hand
Handle Connectors Properly
• Always cap connectors when not in use to prevent dust intrusion
• Avoid touching the connector end-face
• Handle by the connector boot or body, not the end-face
• Keep dust caps clean and replace them if they become contaminated
Maintain a Clean Work Environment
• Clean in an enclosed area when possible
• Wash your hands thoroughly before handling connectors
• Clean inspection tools and adapters regularly to prevent cross-contamination
• Use dedicated cleaning supplies for fiber optic work (do not share with other applications)
Establish Routine Inspection and Cleaning Schedules
Preventive maintenance is far more cost-effective than emergency repairs. Establish routine inspection and cleaning schedules based on:
• Equipment criticality (mission-critical links require more frequent attention)
• Environmental conditions (dusty or high-traffic areas need more frequent cleaning)
• Connection frequency (frequently handled connectors need more frequent cleaning)
Train Technicians Properly
A technician using the wrong cleaning technique can do more harm than good. Ensure all technicians are trained in:
• Proper inspection techniques
• Correct cleaning procedures
• Tool selection for different connector types
• The importance of the "inspect, clean, inspect" principle
Document Everything
Maintain records of:
• When connections were cleaned
• What tools and methods were used
• Inspection results (pass/fail)
• Any issues found and resolved
This documentation helps identify problem areas, track trends, and demonstrate due diligence for compliance purposes.
Part 6: Common Mistakes to Avoid
Mistake 1: Assuming "New" Means "Clean"
Brand-new cables can carry dust or manufacturing residue. Always clean and inspect new cables before use.
Mistake 2: Using Cotton Swabs or Tissues
Cotton swabs and tissues leave threads and fibers behind. Only use lint-free wipes and purpose-made cleaning tools.
Mistake 3: Using the Wrong Alcohol
Lower concentrations of isopropyl alcohol contain water that can leave residues. Some solvents can attack connector epoxy. Use only reagent-grade 99% isopropyl alcohol.
Mistake 4: Blowing on Connectors
Human breath contains moisture and particles that can contaminate the end-face. Never blow on connectors to clean them.
Mistake 5: Over-Wetting
Using too much cleaning fluid can leave residues or damage connectors. Wipes should be damp, not soaking wet.
Mistake 6: Cleaning Only One Connector
Contamination transfers between mating connectors. Always clean both connectors before mating.
Mistake 7: Using Circular Motions
Circular motions can redeposit contaminants. Always wipe in a straight line from one side to the other.
Mistake 8: Skipping Inspection
Never assume a connector is clean. Always inspect after cleaning to verify effectiveness.
Conclusion
Fiber optic cleaning is not a luxury-it is a necessity. With up to 80% of fiber network failures tracing back to dirty or damaged connectors, proper cleaning practices are essential for network reliability, performance, and longevity.
The process is simple but requires discipline: inspect, clean, inspect. Use the right tools for the job. Train your technicians. Establish a "clean before connect" policy. Document your work. And never assume a connector is clean.
A few extra minutes of preventive care can protect your investment, eliminate costly signal issues, and keep your network running at full speed. In fiber optics, cleanliness isn't optional-it's the foundation of every reliable network.