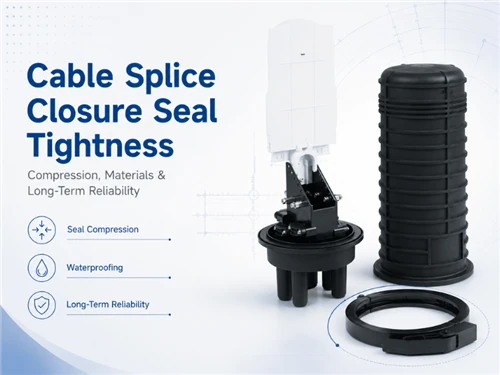
1. What "Tight" Actually Means: The Physics of a Compressed Seal
When technicians tighten a closure lid, the sealing ring compresses into its groove. The rubber deforms, fills the groove's micro-irregularities, and pushes back against the mating surfaces. That push-back force - called contact stress - is what actually stops water. Not the bolt torque. Not the metal-to-metal contact. The contact stress along the seal's interface.
For a seal to be effective, that contact stress must exceed the pressure differential trying to push fluid through it. In an underground closure sitting below the water table, the external hydrostatic pressure might reach 0.1 to 0.3 bar. In a pressurized cable system, it can be higher. The seal needs to maintain contact stress above that threshold for the entire service life - not just on day one.
This brings us to the concept that most installation guides skip: compression ratio. It's not about how hard you squeeze. It's about how much the rubber's cross-section deforms relative to its free state.

The industry-standard target for static face seals - the kind used in most dome-type and inline closures - sits between 15% and 25% compression. Below 15%, the rubber doesn't generate enough contact stress to reliably seal against surface imperfections. Above 30%, you risk permanent deformation (compression set), material extrusion into the gap, and accelerated stress relaxation.
FIELD INSIGHT
I've seen closures where the bolt torque was technically correct but the seal still leaked because the groove dimension didn't match the O-ring's actual cross-section. The torque spec assumes a specific groove geometry. If the manufacturer changed the O-ring durometer or the groove was machined slightly off-spec, the compression ratio shifts out of the window. Torque alone doesn't verify seal integrity - a gap measurement does.
2. The Four Forces That Decide Whether Your Seal Holds
When a sealing ring fails, it's rarely one single cause. It's the interaction of four forces - compression, thermal cycling, chemical attack, and mechanical stress - that gradually erode the seal's ability to maintain contact stress. Understanding how these forces interact is the difference between reactive and preventive maintenance.
2.1 Compression Force: Getting the Squeeze Right
The compression force is set by the closure's mechanical design: groove depth, groove width, O-ring cross-section diameter, and bolt torque. The closure manufacturer engineers these to work together. But here's where things go wrong in practice:
- Replacement O-rings with wrong cross-sections. A 5.33mm O-ring is not interchangeable with a 5.5mm one. That 3% difference changes the compression ratio by enough to matter.
- Deformed or worn grooves. Closures that have been opened and closed multiple times develop burrs, dings, and groove-edge rounding. These create uneven compression paths.
- Inconsistent bolt torque patterns. Tightening bolts in sequence (not in a circle) and in multiple passes ensures even compression. Skipping the star pattern creates high-compression zones and low-compression zones on the same seal.
2.2 Thermal Force: The Expansion Mismatch
Aluminum closures expand at roughly 23 × 10⁻⁶ /°C. EPDM rubber expands at about 150-200 × 10⁻⁶ /°C - nearly ten times more. When the closure heats up in direct sun, the rubber expands faster than the metal groove can accommodate. When it cools at night, the rubber contracts faster, and for a brief period the compression ratio drops below the sealing threshold.
This daily thermal cycling is the single biggest contributor to long-term compression set. Over thousands of cycles, the rubber "remembers" its compressed shape and loses its ability to spring back. The seal doesn't fail catastrophically - it just slowly goes soft.
2.3 Chemical Force: What the Environment Throws at the Seal
Underground closures encounter soil chemistry, groundwater contaminants, and hydrocarbon seepage. Aerial closures face UV radiation, ozone, and acid rain. Each elastomer reacts differently:
| Material | UV / Ozone | Hydrocarbons | Acids / Bases | Service Temp |
|---|---|---|---|---|
| EPDM | Excellent | Poor (swells) | Good | -50 to +150°C |
| Silicone (VMQ) | Excellent | Fair | Fair | -60 to +200°C |
| NBR (Buna-N) | Poor (cracks) | Excellent | Good | -30 to +120°C |
| FKM (Viton) | Good | Excellent | Fair | -20 to +200°C |
Most fiber optic closures specify EPDM - and for good reason. The primary threats in telecom environments are UV, ozone, and moisture, all of which EPDM handles exceptionally well. But if your closure sits near a gas station, refinery, or a road with heavy diesel traffic, hydrocarbon exposure can cause EPDM to swell and lose its compression. In those cases, FKM (Viton) becomes the safer choice despite its higher cost.
2.4 Mechanical Force: Vibration, Impact, and Cable Movement
Cable entry seals face something the lid O-ring doesn't: mechanical force transmitted through the cable itself. Wind load on aerial installations causes cables to sway, transmitting cyclic loads to the entry port seal. Underground cables experience ground settlement, frost heave, and traffic vibration. Each micro-movement works the seal against the cable sheath.
This is why the cable entry port is the most common failure point - not the main lid gasket. The entry seal must grip a cable that's trying to move while simultaneously maintaining a watertight barrier. The mechanical design of the entry port (split cones, compression fittings, or heat-shrink sleeves) matters as much as the rubber compound.
3. Seal Failure Modes: What Actually Goes Wrong in the Field
When a closure leaks, the investigation usually points to one of four failure modes. Recognizing which one occurred tells you whether the problem is installation, material selection, design, or maintenance.

3.1 Compression Set: The Silent Killer
Compression set is the permanent deformation that remains in an elastomer after compressive stress is removed. When you open a closure and the O-ring stays flattened - it doesn't spring back to round - that's compression set. The rubber has chemically cross-linked in its deformed shape.
The causes are cumulative: sustained high temperature (accelerates the cross-linking), over-compression (exceeds 30% squeeze), and time. A closure sitting at 60°C ambient for five years will show 30-50% compression set. At 80°C, that same set happens in under a year.
3.2 Extrusion: When the Rubber Escapes the Groove
Under high pressure differentials - or when the groove gap is too large for the O-ring's hardness - the rubber can extrude into the gap between the mating surfaces. Once material extrudes, it's mechanically damaged. The extruded nib is sheared off during the next thermal cycle, and the seal loses cross-sectional area in that zone.
Extrusion is most common in pressurized cable systems (where the internal pressure pushes the seal outward) and in closures where the bolt torque exceeds design specs. A 70 Shore A O-ring in a properly designed groove should not extrude at telecom pressures. If you see extrusion marks, the design, material, or torque was wrong.
3.3 Ozone and UV Cracking: Surface Degradation
Ozone attacks the double bonds in unsaturated elastomers - NBR is particularly vulnerable. UV radiation breaks polymer chains at the surface. Both produce a characteristic "crazy paving" pattern of fine surface cracks. These cracks start at the surface and propagate inward, eventually breaching the full cross-section.
EPDM and silicone resist this well because their polymer backbones are saturated (no double bonds for ozone to attack). NBR closures installed outdoors will typically show first cracking within 3-5 years. If you're specifying NBR for an aerial closure, you're creating a future failure.
3.4 Freeze-Thaw Displacement: The Cold Climate Problem
In cold climates, water that infiltrates a partially failed seal freezes. Ice expands by 9%, and that expansion forces the seal further open. The next thaw allows more water in. The next freeze pushes further. Within a few winter cycles, a marginal seal becomes a complete failure.
This is why closures in cold regions need higher initial compression ratios (closer to 25%) and should use low-temperature-rated elastomers. Standard EPDM is rated to -50°C, but its resilience (ability to spring back) drops sharply below -20°C. A cold EPDM O-ring is stiff and brittle - it can't accommodate the micro-movements that a warm one absorbs easily.

4. Material Selection: Beyond "Use EPDM"
Most closure manufacturers specify EPDM, and for 80% of applications that's the right answer. But the 20% where EPDM is wrong are where failures cluster. Here's a more nuanced decision framework:
If your closure is underground in a clean soil environment
EPDM, 70 Shore A, 15-20% compression. This is the default. Don't overthink it. The main risk here is not the material - it's the installation. Focus on groove cleanliness and bolt torque sequence.
If you're in a hot climate (ambient >45°C regularly)
EPDM still works, but consider a peroxide-cured grade rather than sulfur-cured. Peroxide curing produces better compression set resistance at elevated temperatures. Specify a maximum permanent set value (typically ≤25% after 22h at 175°C per ASTM D395) and don't accept generic "EPDM" without test data.
If there's hydrocarbon exposure
Switch to FKM (Viton) or at minimum an EPDM/FKM blend. EPDM swells 40-80% in diesel and motor oil. A swollen seal has altered compression geometry and reduced contact stress. FKM handles hydrocarbons beautifully but costs 5-10x more and has poor low-temperature performance.
If you're in a cold climate (ambient <-30°C)
Specify low-temperature EPDM (some grades are rated to -60°C) or silicone. Silicone's weakness is mechanical - it tears more easily and has higher compression set under dynamic loads. But for a static closure seal that doesn't see cable movement, silicone handles cold better than almost anything else.
5. Installation: The Make-or-Break Step
I've examined dozens of failed closures, and a surprising number had perfectly good seals that were simply installed wrong. The rubber was right. The groove was right. The closure was right. The human doing the assembly was wrong. Here's a procedure that eliminates the common mistakes:
5.1 Before You Touch the Seal
- Clean the groove. Run a clean, lint-free wipe through the groove. One grain of sand sitting in the groove creates a local low-compression zone. You won't see it. You won't feel it. But water will find it.
- Inspect the O-ring for damage. Look for nicks, cuts, or flat spots. A new O-ring that's been sitting in a parts bin for five years may already have taken a compression set from its packaging deformation.
- Lubricate with the correct compound. Use the manufacturer-specified lubricant. Never use petroleum-based grease on EPDM - it will swell the rubber and degrade the seal within months. Silicone-based or glycol-based lubricants are the standard. The lubricant reduces assembly friction and helps the O-ring seat evenly, but apply sparingly. Too much lubricant can cause the O-ring to roll or extrude under pressure.
5.2 During Assembly
- Seat the O-ring fully in the groove. It should not be twisted or kinked. Run your finger around the full circumference to feel for irregularities.
- Torque in a star pattern. Not a circle. If there are 8 bolts, tighten in the order 1, 5, 3, 7, 2, 6, 4, 8. Do it in three passes: first to 30% of spec torque, then 70%, then 100%. This distributes the compression load evenly around the entire seal.
- Do not over-torque. Over-torquing doesn't improve the seal - it exceeds the compression window, risks extrusion, and can warp the closure lid. More torque is not better. Correct torque is better.
5.3 Cable Entry Port Sealing
The cable entry port is where most closures leak. This is where the rubber meets the cable sheath - and cable sheaths vary in diameter, surface finish, and material. A few principles:
- Match the seal to the cable OD. Closures typically come with multiple sizing rings or adapters. Don't use a ring that's "close enough." A 0.5mm gap between cable and seal is a leak path.
- Strip the cable sheath cleanly. A ragged strip edge creates a raised lip that prevents the entry seal from seating flat. Use a proper stripping tool, not a knife.
- If using heat-shrink entry sleeves, control the heat. Overheating degrades the inner sealant layer. Under-heating leaves voids. Use a temperature-controlled hot air gun, not an open flame. Watch for the adhesive flow - when you see it bead at the edges, the sleeve is properly seated.
6. Verification: How to Know the Seal Actually Works
Installing the seal is only half the job. Verifying it is the other half - and it's the half most often skipped. Here are the three levels of verification, from simplest to most thorough:
Level 1: Visual and Mechanical Inspection
After assembly, inspect the closure for even gap closure between lid and body. If you can see light between the mating surfaces, the seal isn't compressed. Check bolt torque values with a calibrated torque wrench - don't trust "feels tight enough."
Level 2: Pressure Test
Most quality closures include a test port. Pressurize the closure to 0.5 bar with dry nitrogen or clean air. Submerge in water or apply leak detector solution to the seal interfaces. No bubbles for 5 minutes = pass. This catches gross assembly errors and defective seals before the closure goes into service.
Level 3: Helium Mass Spectrometer Leak Test
For critical installations (data center feeder, submarine cable junctions, nuclear-grade environments), a helium leak test provides detection down to 10⁻⁹ mbar·L/s. This is the gold standard and will detect leak paths that pressure testing misses. It's expensive and usually reserved for high-stakes applications, but it's the only way to truly certify seal integrity.
IP68: What It Means and What It Doesn't
Closures are often rated IP68 - "dust-tight, protected against continuous immersion." But IP68 has specific test conditions: typically 1.5m depth for 30 minutes, or manufacturer-specified depth/time. It does not mean "waterproof forever at any depth." A closure rated IP68 at 2m for 30 minutes may leak at 3m, or after 30 days of continuous immersion. Understand the specific IP68 test parameters your closure was certified to, not just the label.
7. Long-Term Maintenance: Seals Are Not Forever
Here's the uncomfortable truth: no elastomeric seal maintains its full sealing capability for 25 years. They degrade. The question is how fast and whether you catch it before failure.
Recommended Inspection Cycle
| Environment | Inspect | Replace Seal | Key Risk |
|---|---|---|---|
| Underground, temperate, dry | Every 5 years | 12-15 years | Slow compression set |
| Underground, high water table | Every 3 years | 8-10 years | Hydrostatic + chemical |
| Aerial, hot climate | Every 3 years | 8-12 years | UV + thermal cycling |
| Aerial, cold climate | Every 4 years | 10-14 years | Freeze-thaw + low-temp stiffening |
| Industrial / chemical zone | Every 2 years | 5-8 years | Chemical attack |
These are starting points, not absolute numbers. The real answer depends on the specific elastomer, the closure design, and the micro-environment. But the principle is clear: treat seals as consumables, not lifetime components. Building a maintenance schedule that assumes the seal will last as long as the closure is how you get premature failures.
8. Heat Shrink vs. Mechanical Seals: A Practical Comparison
Cable entry ports use two fundamental sealing approaches: mechanical compression seals (O-rings, gaskets, split cones) and heat-shrink sleeves with internal sealant. Each has advantages, and the choice depends on the application:
| Attribute | Mechanical Seal | Heat Shrink Sleeve |
|---|---|---|
| Reusability | Can be opened and resealed | One-time; must cut and replace |
| Cable compatibility | Requires correct sizing ring per cable OD | Conforms to any cable shape |
| Installation speed | Fast (5-10 min per port) | Slower (10-20 min per port, heating) |
| Long-term compression | Subject to compression set | Sealant cures and holds shape |
| Field repair | Replace O-ring, reassemble | Cut off, clean, apply new sleeve |
| Cost | Lower per port | Higher (consumable per use) |
In practice, many closures use both: mechanical seals for the main lid (where re-entry is needed) and heat-shrink sleeves for cable entries (where long-term conformance to irregular cable surfaces matters more). The hybrid approach gives you reusability where you need it and permanent conforming seals where you need them.
9. Common Mistakes I See in the Field
After years of looking at both good and failed installations, here are the mistakes that repeat:
- Reusing old O-rings after maintenance. A seal that's been compressed for years has taken a set. Reinstalling it gives you reduced compression from day one. Always use a new O-ring when reopening a closure for maintenance.
- Using the wrong lubricant. Petroleum jelly on an EPDM seal. It seems harmless. It's not. The EPDM swells, the compression geometry changes, and within 6-12 months the seal has failed. Use silicone or glycol-based lubricants only.
- Ignoring the cable entry sizing. The closure came with 6 sizing rings for a reason. Using the wrong one - or none - means the cable isn't properly gripped. Movement + poor seal = water ingress.
- Storing O-rings deformed. O-rings stored in a stretched or compressed state take a permanent set even before installation. Store them flat, in their original packaging, away from UV and ozone sources (electric motors, fluorescent lights).
- Not testing after assembly. The closure has a test port. Use it. A 5-minute pressure test catches 90% of assembly errors before they become field failures.
Conclusion: The Seal Is a System, Not a Gasket
The sealing ring in a cable splice closure isn't a gasket you torque down and forget. It's a dynamic system - rubber under sustained stress, cycling through temperature, aging chemically, and accommodating mechanical movement. Ensuring its tightness means engineering the whole system: the right material for the environment, the correct compression ratio for the design, clean installation practices, and a maintenance schedule that treats the seal as a consumable component with a finite service life.
The closures that last 25 years aren't the ones with the best rubber. They're the ones where someone understood that a two-dollar O-ring carries the entire reliability of the fiber link - and treated it with that level of respect.