Quick Answer: What Tools Are Needed for Fiber Optic Installation?
A technician installing an FTTH drop, preparing a loose-tube OSP cable, fusion-splicing fibers inside a closure and certifying the completed link will not use exactly the same tool set.
Most fiber optic deployment tools can be grouped into five working stages:
- Cable placement and route-access tools
- Cable opening and fiber-preparation tools
- Splicing and termination tools
- Cleaning and inspection tools
- Testing and acceptance equipment
| Installation Stage | Typical Tools | Main Purpose |
|---|---|---|
| Cable placement | Duct rod, fish tape, pulling grip, cable roller, blowing equipment | Move cable through ducts, buildings or OSP routes |
| Cable access | Cable cutter, sheath slitter, ring tool, buffer tube tool | Open the cable without damaging internal fibers |
| Fiber preparation | Fiber stripper, aramid scissors, precision cleaver | Prepare individual fibers for termination or splicing |
| Splicing | Fusion splicer, cleaver, splice sleeves, preparation tools | Create and protect optical fiber splices |
| Connector termination | Crimper or connector-specific installation tools | Install connectors and strain-relief components where required |
| Cleaning | Lint-free wipes, approved cleaning fluid, one-click cleaner | Remove contamination before mating or testing |
| Inspection | Fiber inspection microscope or probe | Check connector end-face condition |
| Basic troubleshooting | Visual Fault Locator (VFL) | Identify continuity issues and some visible faults |
| Loss testing | Light source + power meter / OLTS | Measure end-to-end insertion loss |
| Event analysis | OTDR | Locate and characterize splices, connectors, bends and faults |
1. Cable Placement Tools Come Before Fiber Preparation
Many fiber optic tool guides begin with strippers and cleavers. That skips the first part of deployment: getting the cable safely from one point to another.
For outside-plant and FTTH networks, installation may involve pulling, blowing, aerial placement, building entry or underground duct routes. The Fiber Optic Association (FOA) treats cable installation equipment as part of the installer tool environment rather than limiting the category to small hand tools.
Duct Rods, Fish Tapes and Pulling Tools
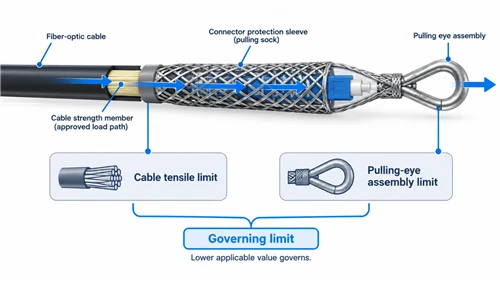
Duct rods and fish tapes help establish a pathway through conduit before the fiber cable is installed. Depending on the route and cable type, contractors may also use:
- pulling eyes;
- cable grips;
- swivels;
- cable rollers;
- approved cable lubricant;
- pulling-tension monitoring equipment.
Cable Blowing Equipment
Long microduct and underground routes may use cable blowing instead of conventional pulling.
Blowing equipment combines controlled airflow with mechanical feeding to install compatible fiber cable through ducts or microducts. The compressor, blowing head, duct seals and cable should be treated as one installation system.
For procurement teams, this means confirming the duct ID, cable OD and cable construction before selecting deployment equipment.
Wall and Building Route-Access Tools
Building installations can also require drilling equipment, wall-entry guides, fish rods, conduit tools, cable guides and pathway inspection equipment.
These belong to the route-access stage and should not be confused with tools that prepare the optical glass fiber itself.
2. Cable Opening Tools Must Match the Cable Construction
Once the cable reaches the splice or termination location, the next task is accessing the fibers without damaging them.
An FTTH drop cable, indoor tight-buffer cable and armored loose-tube OSP cable can have very different structures. A typical access sequence may involve:
Each layer requires a suitable tool and controlled cutting depth.
Cable Cutters
Cable cutters are generally used to cut the cable to length or remove cable sections that will not be retained.
Selection should consider:
- cable diameter;
- jacket material;
- armor construction;
- strength-member type.
The objective is a controlled cut without crushing or deforming the internal cable structure.
Jacket Slitters and Ring Tools
A jacket slitter or ring tool allows the installer to open an outer sheath while reducing the chance of cutting into internal tubes or fibers.
This becomes especially important on larger OSP cables where an ordinary utility knife provides limited depth control.
Buffer Tube Tools
Loose-tube cable requires controlled access to fibers inside a PBT or similar buffer tube.
The correct tool depends on:
- tube diameter;
- tube wall thickness;
- longitudinal or ring-cut access;
- end access or mid-span access.
Aramid Fiber Scissors
Aramid yarn is commonly used as a strength member in fiber optic cables and assemblies.
Standard office scissors may fold, pull or fray the yarn instead of producing a controlled cut. Fiber scissors intended for aramid yarn typically use hardened cutting surfaces designed for cleaner cutting.
3. Fiber Strippers Prepare the Coated Fiber for Splicing or Termination
After the jacket and buffer structure have been opened, the technician eventually reaches the coated optical fiber.
A fiber stripper removes coating or buffer material while minimizing damage to the 125 μm glass fiber underneath.
Different stripping stages may include:
- outer cable or cord jacket removal;
- 900 μm tight-buffer removal;
- 250 μm coating removal;
- preparation of bare 125 μm fiber.
Professional multi-hole stripping tools may provide separate stripping positions for these different layers.
What Buyers Should Check
Fiber Compatibility
Confirm supported coating and buffer diameters rather than relying only on the description "fiber optic stripper."
Tool Condition
Worn, contaminated or damaged stripping surfaces can increase the risk of scoring or weakening the bare fiber.
Other factors include:
- required stripping length;
- blade or stripping-hole condition;
- repeated-use ergonomics;
- replacement parts and maintenance requirements.
4. Precision Fiber Cleavers and Fiber Scribes Are Different Tools
Precision cleavers and fiber scribes are sometimes incorrectly grouped together. They may both be involved in breaking glass fiber, but their intended use and level of control are different.
Precision Fiber Cleaver
A precision cleaver prepares a controlled fiber end before fusion splicing, mechanical splicing or certain field-connector processes.
FOA describes the normal splice-preparation sequence as:
A precision cleaver is typically evaluated using parameters such as:
- supported fiber and coating size;
- cleave angle;
- cleave length;
- blade positions;
- blade life;
- repeatability.
For example, professional cleaver specifications may state compatibility with 250 μm and 900 μm coated fiber together with a controlled cleave angle.
Fiber Scribe
A fiber scribe uses a hard tip or blade to score the glass so the technician can then break the fiber manually.
It may be useful for certain manual termination processes, but it should not automatically be treated as equivalent to a precision cleaver used for fusion splicing.
5. Fusion Splicing Requires a System of Tools, Not Only a Splicer
The fusion splicer is the most visible piece of equipment, but successful field splicing depends on several preparation and protection steps.
A Practical Fusion-Splicing Kit May Include
- fiber stripper;
- lint-free wipes;
- approved cleaning fluid;
- precision cleaver;
- fusion splicer;
- splice-protection sleeves;
- sleeve heater;
- fiber disposal container;
- tray-routing tools;
- replacement electrodes and cleaver blades where required.
The splice enclosure also affects the field workflow.
An OSP crew working inside a sealed closure needs enough cable preparation length, tray capacity and fiber-management space to complete the splice without creating excessive fiber bends or congestion.
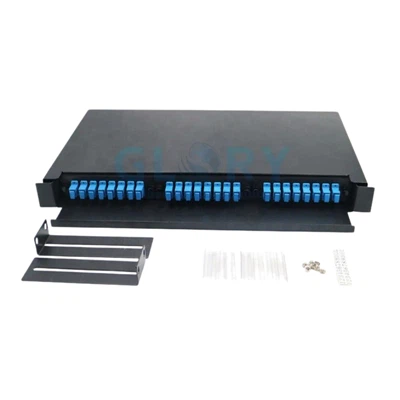
Glory's fiber splice closure range is designed for organizing and protecting fiber splices in aerial, duct and other OSP network applications.
6. Connector Termination Tools Depend on the Termination Method
"Fiber connector tools" cannot be specified correctly until the termination method is known.
Splice-Based Termination
May use fusion-spliced pigtails or splice-on connectors and therefore requires fiber preparation and splicing tools.
Mechanical Termination
May require connector-specific assembly, crimping or preparation tools defined by the connector manufacturer.
Other possibilities include:
- factory-terminated assemblies;
- mechanical field-installable connectors;
- adhesive-and-polish connectors;
- preconnectorized FTTH drops.
Fiber Optic Crimping Tools
Crimping tools are relevant where the connector design includes components requiring controlled crimping, such as strain-relief or retention hardware.
The correct crimper should match the connector manufacturer's die geometry and assembly procedure.
7. Cleaning and Inspection Tools Belong in the Core Kit
Cleaning should not be treated as an optional activity performed only after a fiber link fails testing.
Connector contamination can affect insertion loss and reflectance, and contamination can transfer from one connector surface to another during mating.
Common cleaning tools include:
- lint-free wipes;
- approved optical cleaning fluid;
- reel-type cleaners;
- one-click cleaners;
- adapter cleaners;
- clean dust caps and storage containers.
Fiber Inspection Microscope or Probe
Inspection equipment allows the technician to evaluate a connector end face before mating.
IEC 61300-3-35:2022 addresses visual and automated inspection of fiber optic connector end faces.
The objective is not merely to make the connector look clean. It is to reduce the chance that contamination becomes part of the completed optical interface.
8. Fiber Testing Tools Answer Different Questions
A VFL, optical power meter, OLTS and OTDR are all fiber test instruments, but they answer different engineering questions.
Visual Fault Locator - "Is There a Visible Fault?"
A VFL can assist with:
- continuity checks;
- fiber identification;
- locating some severe bends;
- identifying breaks where visible light escapes;
- basic short-range troubleshooting.
A VFL does not certify the end-to-end insertion loss of the optical link.
Optical Power Meter - "What Optical Power Am I Receiving?"
An optical power meter measures optical power at a specified wavelength.
Used with an appropriate optical light source, it can measure end-to-end optical loss.
OLTS - "Does the Link Meet Its Loss Requirement?"
A light source and power meter, or an Optical Loss Test Set, measures the cumulative end-to-end insertion loss of the installed link.
This measurement incorporates fiber attenuation together with connector and splice loss.
OTDR - "Where Is the Event?"
An Optical Time Domain Reflectometer analyzes returned and backscattered light along the fiber.
It can help characterize:
- connectors;
- splices;
- bends;
- breaks;
- sections showing abnormal loss.
9. Build the Tool Kit Around the Job, Not Around the Tool Catalogue
A more practical way to select fiber optic deployment tools is to begin with the network application.
FTTH Drop Installation
- drop-cable opening tools
- strength-member cutters
- fiber stripper
- precision cleaver
- fusion splicer or field-connector tools
- cleaning tools
- VFL
- optical power meter
OSP Splicing Crew
- sheath and armor opening tools
- buffer tube access tools
- fiber stripper
- precision cleaver
- fusion splicer
- splice protection
- inspection equipment
- OLTS and/or OTDR
Data Center Cabling
- connector cleaners
- end-face inspection
- polarity verification
- optical loss testing
- high-density connector access tools
Microduct Installation
- duct preparation tools
- duct cutters
- blowing equipment
- duct calibration equipment
- sealing components
- microduct connectors
- route verification tools
10. Buyer's Checklist for Fiber Optic Deployment Tools
Instead of buying a generic tool case based on how many pieces it contains, procurement teams should start with the following project variables.
1. Cable Construction
Confirm indoor/outdoor design, tight buffer or loose tube, armor, cable diameter and strength-member construction.
2. Fiber Preparation
Confirm coating diameter, buffer dimensions, stripping process and required cleave method.
3. Termination Method
Determine whether the installation uses fusion-spliced pigtails, field connectors, splice-on connectors or factory assemblies.
4. Installation Environment
Review weather exposure, working space, available power, lighting and transport requirements.
5. Acceptance Requirement
Define continuity, insertion loss, polarity, OTDR trace and connector inspection requirements.
6. Consumables
Include wipes, cleaning fluid, splice sleeves, electrodes, blades, batteries and fiber scrap containers.
11. Common Fiber Tool Selection Mistakes
Mistake 1: Treating a Fiber Scribe as a Precision Cleaver
Both can create a break in glass fiber, but fusion splicing requires controlled fiber preparation. A suitable precision cleaver should therefore be specified for the splicing process.
Mistake 2: Buying Preparation Tools Before Confirming Cable Structure
Two cables with the same fiber count may have completely different jackets, tubes, armor systems and strength members.
The cable datasheet should come before the tool list.
Mistake 3: Using One Cutting Tool for Every Cable Layer
Outer jackets, aramid yarn, buffer tubes and coated fiber require different cutting or stripping actions. A tool that works on one layer may damage another.
Mistake 4: Testing Before Inspecting Connectors
A contaminated connector can produce additional loss and reflections that appear to be network faults. Inspection and cleaning should therefore be incorporated into the test process.
Mistake 5: Assuming an OTDR Replaces End-to-End Loss Testing
OTDR and OLTS measurements have different purposes.
Select test equipment according to the acceptance requirement rather than choosing the instrument with the largest feature list.
Mistake 6: Ignoring Tool Maintenance
Cleaver blades, stripping surfaces, fusion-splicer components and cleaning tools are wear items.
A technically correct tool can still produce inconsistent field results when its condition is not controlled.
12. Safety Equipment Is Part of the Fiber Tool Kit
Bare fiber scraps are small, sharp pieces of glass and can be difficult to see.
FOA recommends appropriate eye protection together with careful handling and disposal of fiber scraps during fiber installation work.
Personal Protection
- safety glasses;
- appropriate work gloves where required;
- suitable lighting.
Fiber Scrap Control
- controlled scrap container;
- clean work surface;
- dark or contrasting work mat where useful.
How Glory Supports Fiber Deployment Projects
Fiber deployment procurement usually extends beyond the technician's hand-tool case.
The installation team may also need to coordinate:
- fiber optic cable;
- FTTH drop cable;
- microduct accessories;
- route hardware;
- fiber storage hardware;
- splice closures;
- fiber distribution and terminal boxes;
- pigtails and connectivity;
- project-specific deployment accessories.
Glory Optical supplies fiber cable, FTTH products, splice enclosures and route-side fiber deployment components for access and outside-plant networks.
The current Glory Fiber Tool category includes products such as microduct connectors, cable clamps, cable storage products and other telecom deployment accessories.
Frequently Asked Questions
Q: What are the most important fiber optic installation tools?
A: There is no universal tool list. For splicing work, the basic fiber-preparation process normally requires stripping, cleaning and precision cleaving before splicing. Cable-opening tools, cleaning materials and testing equipment should then be added according to the project.
Q: What tools are needed for fusion splicing?
A: A typical setup includes cable-preparation tools, fiber stripper, cleaning materials, precision cleaver, fusion splicer, splice-protection equipment and suitable fiber-management tools. Inspection and testing equipment may also be required for acceptance.
Q: What is the difference between a fiber cleaver and a fiber stripper?
A: A fiber stripper removes coating or buffer material from optical fiber. A cleaver creates a controlled end on the exposed glass fiber before splicing or certain connector processes.
Q: Is a fiber scribe the same as a fiber cleaver?
A: No. A fiber scribe scores the glass so the fiber can be broken manually. A precision cleaver is designed to produce a more controlled end geometry, typically for fusion splicing and other precision preparation processes.
Q: Do I need an OTDR for fiber installation?
A: It depends on the network and acceptance specification. OTDR testing is useful for locating and characterizing events along a link, while end-to-end insertion loss is normally measured using a light source and power meter or OLTS. Some short premises links may not require OTDR testing.
Q: Why should fiber connectors be inspected before testing?
A: Contamination on connector end faces can introduce loss and reflections and may transfer to another connector during mating. Inspection and cleaning before connection reduce the risk of contamination affecting test results.
Q: How should a contractor choose a fiber optic tool kit?
A: Start with the project rather than the tool case. Identify the cable construction, deployment method, preparation requirement, termination process, working environment and acceptance specification, then build the tool list around those requirements.
Q: Can the same fiber tools be used for FTTH and OSP installation?
A: Some preparation tools overlap, but the full tool sets are usually different. FTTH work often emphasizes drop-cable access, subscriber termination and basic testing, while OSP work may require heavier cable-opening tools, buffer-tube access, fusion splicing, closure preparation and more extensive test equipment.
Technical References
The installation and testing principles discussed in this guide can be cross-checked against established fiber-industry guidance and equipment documentation.
- The Fiber Optic Association (FOA) - Fiber Optic Installation Tools
- The Fiber Optic Association - Fiber Termination and Splicing
- The Fiber Optic Association - Fiber Optic Testing
- IEC 61300-3-35 - Fiber Optic Connector End-Face Inspection
- Fluke Networks - OTDR Testing Guidance