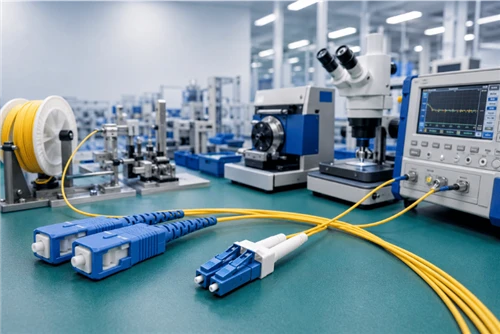
A fiber patch cord is not "two connectors glued onto a cable." Quality is set across seven controlled steps -- material verification, cable stripping, epoxy curing, crimping, end‑face polishing, optical and geometric testing, then labeling and traceable packaging. A clean‑looking end face is a precondition for shipment, not proof of performance: insertion loss, return loss and 3D end‑face geometry are what your link budget actually depends on. This guide walks through what happens at each step, what commonly goes wrong, and what a real batch test report should show a buyer before the cords ever leave the factory.
Most guides to fiber patch cord manufacturing stop at the assembly line -- cut, strip, glue, polish, done. That leaves out the half of the process that actually determines whether the cord works in your network: which test catches which defect, why a connector can pass a visual check and still fail optically, and what a batch test report needs to show before you accept it. This guide covers both halves, from an engineering process perspective rather than a factory-tour perspective.
What Must Be Confirmed Before Production Starts
Most patch cord failures are decided before a single fiber is cut -- at the specification stage. Three things need to be locked down first.
Fiber, Cable and Jacket Requirements
Single-mode assemblies are normally built on OS2 fiber to ITU-T G.652D, or a bend-insensitive G.657.A1/A2 variant where the route includes tight corners or cassette routing. Multimode assemblies use laser-optimized OM3, OM4 or OM5 fiber at 50/125 µm. Jacket material follows the installation environment, not preference: PVC for standard indoor runs, LSZH where fire code requires low-smoke zero-halogen material, and a separate outdoor-rated jacket where the cord is exposed to UV or moisture. Cable diameter (typically 2.0 mm or 3.0 mm) and minimum bend radius should be confirmed against the datasheet -- a common planning reference is roughly 10x the cable outer diameter at rest and about 20x under pulling tension, though the cable's own datasheet and the project spec always take precedence over a rule of thumb.
Connector, Polish and Polarity Requirements
SC, FC and ST connectors use a 2.5 mm ferrule; LC uses a 1.25 mm ferrule, which is why LC dominates high-density patch panels and SFP/SFP+ transceiver ports. MPO/MTP connectors carry 8, 12, 16 or 24 fibers in a single rectangular ferrule. Polish type is not a cosmetic choice: UPC uses a convex physical-contact surface aligned perpendicular to the fiber axis, while APC uses a similar surface polished at approximately 8°. The two polish types must not be directly mated. For a full breakdown of connector geometry, ferrule tolerances and when APC is worth the added cost over UPC, see our fiber connector types guide.
Turning an RFQ into an Acceptance Plan
A specification sheet that only lists connector type and length is incomplete. In practice, the RFQ gaps that most often come back to cause problems on a project are a missing polish type, a cable length with no allowance for slack, an indoor-rated jacket ordered for an outdoor run, and no explicit requirement for a test report to ship with the order. Naming insertion loss and return loss targets, the end-face acceptance grade, and the mechanical requirements (pull test, bend cycling) up front closes most of these gaps before production starts -- see our patch cable installation guide for the full RFQ field list.
The Seven-Step Manufacturing Process at a Glance
Every step below produces a specific failure mode if it is rushed or skipped, and every failure mode is caught (or missed) by a specific downstream check. That mapping is the part most process overviews leave out.
| Step | Process | Main risk if rushed | Caught by |
|---|---|---|---|
| 1 | Incoming inspection & cable cutting | Wrong fiber/ferrule bin, out-of-tolerance length | Material check, length gauge |
| 2 | Stripping & fiber preparation | Cladding nicks, micro-cracks | Cleave inspection, later pull test |
| 3 | Epoxy injection & curing | Air bubbles, incomplete cure | Visual + delayed pull-test failure |
| 4 | Crimping & strain relief | Aramid not captured, boot stress | Pull test, field vibration testing |
| 5 | End-face polishing | Scratches, undercut, protrusion | Microscope for defects; interferometer for geometry |
| 6 | Optical & geometry testing | High IL/RL, geometry out of spec | IL/RL meter, 3D interferometer |
| 7 | Labeling & packaging | Re-contamination, mixed batches | Post-pack spot retest, lot tracking |
1Step 1 - Incoming Material Inspection and Cable Cutting
Checking Cable, Ferrules, Connector Parts and Labels
Before any cable is cut, incoming components are checked against the work order: fiber type and count, ferrule material and bore specification, connector housing color, and jacket color code. Ferrule bore, fiber cladding diameter and concentricity must match the approved connector specification. Mixing ferrule grades or fiber tolerances can increase lateral offset and insertion loss even when the parts appear mechanically compatible.
Cutting Length, Tolerance and Component Loading
Cable is cut to the ordered length plus the working allowance needed for stripping and termination, with a defined tolerance band appropriate to the order (tighter for data-center trunk cables where uniform slack matters, looser for general patch stock). Ferrules, boots and housings are loaded by matched batch, not mixed bins -- a practice that avoids introducing a different ferrule lot mid-run, which would otherwise make later batch-level test data harder to interpret.

Cable feeding, winding and component preparation on the Glory Optical production line.
2Step 2 - Cable Stripping and Fiber Preparation
Removing the Jacket, Aramid Yarn and Buffer
The outer jacket, aramid strength yarn and buffer coating are stripped in stages. The correct stripper is used for each layer-2/3 mm jacket, 900 µm buffer and 250 µm coating-without contacting the 125 µm glass cladding.
How Scratches and Micro-Cracks Begin
A stripper blade set even slightly too deep will nick the glass cladding rather than just the coating. The nick may be invisible at this stage, but it becomes a stress point that can propagate into a fracture during cleaving, curing shrinkage, or later handling -- and it is one of the harder defects to trace back to its origin once a cord fails a pull test downstream.
Why 125 µm Refers to Cladding, Not the Single-Mode Core
The 125 µm figure describes the glass cladding diameter, which is shared by most telecom fiber. The light-carrying core is roughly 9 µm for single-mode fiber. OM1 is typically 62.5/125 µm, while OM2, OM3, OM4 and OM5 are typically 50/125 µm. Two fibers can share the same cladding diameter and still be incompatible at the core.

Preset stripping parameters help remove the correct cable layer without damaging the glass.
3Step 3 - Epoxy Injection, Fiber Insertion and Curing
Mixing Ratio, Pot Life and Air-Bubble Control
Two-part epoxy is mixed and injected into the ferrule bore before the bare fiber is inserted. The mix ratio must be accurate, and the epoxy must be used inside its pot-life window before viscosity changes. A trapped air bubble can weaken the fiber-to-ferrule bond and contribute to fiber pistoning or microbending as the assembly is stressed or cycled.
Curing Temperature and Time
Heat-cure epoxies need a controlled oven dwell time and temperature to fully cross-link. Pulling a connector off the cure rack early -- to save cycle time -- is a classic root cause of delayed pull-test failures that don't appear until the connector is stressed in the field, well after it has already passed a same-day optical check.
Why the Adhesive Datasheet Must Control the Cure Cycle
Different epoxy chemistries have different cure profiles, and a schedule tuned for one adhesive is not automatically correct for another. The datasheet -- not a shop-floor habit -- should set the oven time and temperature for whichever adhesive is actually in use on that line.

Controlled connector assembly and curing, followed by batch crimping.
4Step 4 - Crimping, Connector Assembly and Strain Relief
Securing the Aramid Strength Members
A crimp sleeve captures the aramid yarn against the connector housing so that any pulling force on the cable is carried by the yarn, not by the fiber-epoxy bond inside the ferrule. A crimp that misses the yarn -- even if the connector still "feels" solid -- transfers tension directly to the glass-epoxy interface the first time the cord is pulled or flexed.
Preventing Boot Stress and Near-Connector Breaks
The strain-relief boot controls how sharply the cable can bend right where it exits the connector housing. Poor boot geometry or an over-tight crimp concentrates bending stress in exactly the spot fiber can least tolerate it, which is why a disproportionate share of field failures cluster within a few centimeters of the connector body rather than mid-cable.

Connector housings, sleeves and boots are assembled after the fiber-to-ferrule bond is secured.
5Step 5 - UPC and APC End-Face Polishing
From Epoxy Removal to Final Polish
The ferrule tip is first ground to remove the epoxy bead and any fiber protrusion above the ferrule surface, then carried through a progressive sequence of polishing films of decreasing grit size to shape the final end-face geometry -- domed for UPC, angled at 8° for APC.
Why There Is No Universal Four-Film Recipe
The film sequence, pressure and dwell time depend on the ferrule material (zirconia ceramic is standard for single-mode; stainless steel or polymer appears in some multimode and industrial connectors) and the target radius of curvature and apex offset for that connector family. A recipe tuned for one product line will not automatically produce a compliant end face on a different ferrule material or connector geometry.
Cleaning Between Polishing Stages
Residual compound from one film stage that carries over into the next stage embeds into the glass rather than polishing it, producing exactly the kind of fine scratching that a rushed process tends to leave behind. Each stage is cleaned before the next film is applied.
Common Defects: Scratches, Undercut, Protrusion and Incorrect APC Angle
- Scratches - usually from contaminated film or leftover grit from a coarser stage.
- Undercut fiber - the fiber sits recessed below the ferrule surface, preventing full physical contact when mated.
- Protrusion - the fiber sits proud of the ferrule surface, which can damage the mating connector's end face.
- Incorrect APC angle - deviation from the specified angle can reduce return loss, increase reflectance and prevent proper physical contact.

Batch polishing controls film sequence, pressure and dwell time across multiple connectors.
6Step 6 - End-Face, IL, RL and Geometry Testing
This is the step that actually separates a connector that looks finished from one that performs to spec -- and it's the step most manufacturing overviews compress into a single sentence.
Visual End-Face Inspection
Core, Cladding and Contact Area
The current edition of IEC 61300-3-35:2022 evaluates scratches and defects in Zone A (core) and Zone B (cladding), while contamination is assessed across the full ferrule contact area. A microscope check therefore needs to cover more than the small central fiber image.

IEC 61300‑3‑35:2022: evaluate defects in Zones A and B, and inspect the full contact area for contamination.
Inspect–Clean–Inspect
The reliable sequence is to inspect the end face first, clean only if contamination is found, then re-inspect before the connector moves to the next stage. Cleaning a connector that is already clean risks introducing new contamination rather than removing it.
Insertion Loss and Return Loss Testing
Test Wavelengths, Reference Cords and Baseline Setting
Single-mode assemblies are typically tested at 1310 nm and 1550 nm; multimode at 850 nm and 1300 nm. A calibrated reference cord sets the baseline power before the unit under test is measured, per methods described in IEC 61300-3-4 for attenuation and IEC 61300-3-6 for return loss. If the reference cord itself is contaminated, every measurement taken against it inherits the error.
Why Low IL Does Not Automatically Prove Good RL
Insertion loss and return loss measure different physical phenomena. IL measures how much light is lost passing through the connection; RL is the positive dB magnitude of the ratio between incident and reflected power. A connector can post an excellent IL reading while failing its RL limit if surface finish or apex geometry reflects more light back toward the source than the application allows. A common project specification may call for IL ≤ 0.20 dB typical / ≤ 0.50 dB maximum, with RL ≥ 50 dB for UPC or RL ≥ 60 dB for APC, but the approved product specification and test method control acceptance. A report that states only IL-or only a batch average-is incomplete for a project that also specifies RL.
3D Interferometer Testing
A 3D interferometer measures the physical topography of the polished end face against limits defined in IEC 61755-3-1 for UPC ferrules and the equivalent IEC 61755-3-2 for APC ferrules. Three parameters matter most:
Radius of Curvature, Apex Offset and Fiber Height
- Radius of curvature - how tightly the polished dome is shaped; too flat or too sharp changes how much contact force concentrates at the core.
- Apex offset - how far the highest point of the dome sits from the fiber core; a large offset means two mated connectors may not make contact exactly core-to-core.
- Fiber height - how far the fiber sits above or below the ferrule surface, directly related to the undercut/protrusion defects described in Step 5.
Geometry is used for process qualification and production control. Whether data is recorded per unit or by qualified sampling should be defined in the control plan; it complements IL/RL testing rather than replacing it.
Additional MPO/MTP Testing
Fiber-by-Fiber Loss, Polarity and MT Ferrule Geometry
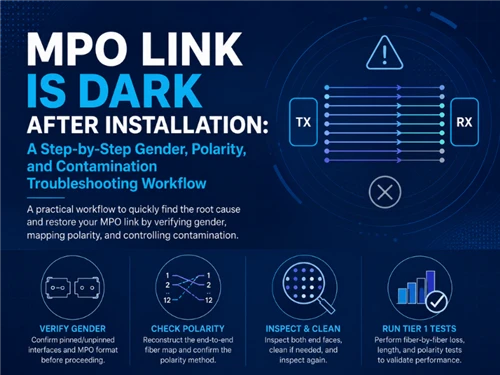
Multi-fiber MPO/MTP assemblies add two checks that single-fiber connectors don't need: fiber-by-fiber insertion loss across every position in the ferrule (a single contaminated or misaligned fiber in a 12- or 24-fiber ferrule doesn't announce itself in an average reading), and polarity verification against the intended Type A, B or C mapping. Our MPO fiber patch panel guide and MTP/MPO deployment and testing guide cover this in more depth, including how a polarity mismatch between panel, trunk and transceiver is the most common cause of an MPO link failing at commissioning despite every individual fiber testing clean.

Optical loss measurement and 400× CCD end-face inspection on the Glory Optical test line.
7Step 7 - Labeling, Packaging and Batch Traceability
Dust Caps and End-Face Protection
Every tested connector is capped immediately after final inspection. A dust cap prevents gross contamination in transit, but it is not a cleanliness certification by itself -- a cord should still be inspected on arrival at the job site before it is mated, the same as any other connector.
Serial Number, Lot Number and Test Report
Traceability can be defined at unit or batch level according to the approved control plan. At minimum, the lot number should identify the production run and the associated inspection or test record so a field issue can be investigated against the relevant process data.
Why Post-Packaging Retesting Matters
This step is easy to skip and rarely gets mentioned in competitor process overviews, but it closes a real gap: coiling, dust-cap seating and transit handling all happen after the Step 6 test data was recorded. A spot-check retest after final packaging -- even on a sampling basis -- catches damage or contamination introduced between the test bench and the shipping carton, rather than assuming the pre-packaging result still holds by the time the box is sealed.
Need a batch tested to a specific IL/RL and geometry spec?
Testing scope, sampling level, traceability and documentation can be defined against the approved product specification and order requirements.
What Buyers Should Check on a Patch Cord Test Report
Product Identification and Test Conditions
A usable test report identifies the part number and lot, connector type and polish on each end, fiber type, the wavelength(s) tested, the reference-cord method used, and the date and equipment ID. Without the test conditions, a bare number is not verifiable against your own project requirements.
Average Values Are Not Enough
Median, P95, Maximum and Failure Count
An average insertion loss figure can hide a batch with a long tail of marginal units. A batch that averages a comfortable 0.15 dB can still contain individual cords at 0.5–0.6 dB if the distribution is wide -- and an average alone will not tell you that. Ask for the median, the 95th-percentile value, the worst-case maximum, and how many units (if any) were rejected and reworked from that lot. These four numbers together describe a batch far better than a single averaged figure.
100% Testing vs Sample-Based Qualification
"100% tested" is a specific claim, and it's worth confirming what it actually covers. End-of-line insertion loss and end-face inspection are commonly run on every finished connector in a modern factory. Return loss, 3D geometry and mechanical (pull/bend) tests are sometimes run at 100% and sometimes on a qualified sampling basis tied to a stable, previously validated process. Neither approach is automatically wrong, but a buyer should know which tests are which before treating "100% tested" as covering every parameter on the datasheet.
What Manufacturing Defects Look Like in the Field
Tracing a field symptom back to the manufacturing step that caused it is a genuinely useful skill for anyone specifying or troubleshooting patch cords.
Dirty Connector Straight from the Package
New does not automatically mean clean. Contamination can occur during packaging, transit or storage even behind a dust cap. Treat every connector -- new or reused -- as unverified until it has been inspected, per the inspect-clean-inspect sequence described in Step 6.
Clean End Face but High Loss
A connector can look clean under a standard microscope and still read high loss because the microscope does not validate the optical reference, mating adapter, fiber match or end-face geometry. Verify the reference cord and test setup, reseat or replace the adapter, then use a controlled substitution to isolate the cord. If the symptom follows the connector, investigate geometry, fiber mismatch or termination damage.
Intermittent Loss Near the Connector Boot
A link that works fine while a cabinet door is open and destabilizes once it's closed is a classic sign of stress concentrated near the connector body -- often traceable back to the crimp and strain-relief quality discussed in Step 4, rather than anything wrong with the fiber itself.
APC/UPC or Polarity Mismatch
Directly mating an APC plug to a UPC plug through an adapter creates incompatible physical-contact geometry, typically causing excess loss and risking end-face damage. For MPO systems, a polarity mismatch can map transmit lanes to the wrong receive positions, preventing link establishment or producing incorrect channel assignments.
How Glory Supports Standard and Custom Patch Cord Orders
Available Fiber, Connector, Jacket and Length Options
Glory Optical's standard catalog spans single-mode OS2 and multimode OM3/OM4/OM5 patch cords in SC, LC, FC, ST and MPO/MTP interfaces, UPC and APC polish, simplex, duplex and uniboot configurations, in PVC, LSZH and armored jacket options. Browse the current range on the fiber patch cord product page, or see pre-terminated fiber optic cable assemblies and fiber optic pigtails for related termination formats.
Samples, Drawings, Test Reports and Batch Requirements
For OEM and custom builds -- private-label branding, non-standard lengths, custom polarity mapping, or project-specific test-report formats -- our OEM/ODM program covers design drawing review, sample approval, and batch-level documentation aligned to ISO 9001:2015 quality-management practice. Learn more about the factory and engineering team on our About Us page, or submit a specification through Request a Quote.
Frequently Asked Questions
Q: How long does it take to manufacture a custom patch cord?
A: Lead time depends on connector type, jacket, length, branding, test documentation and order quantity. Confirm the sample-approval and production schedule against the final configuration before ordering.
Q: Are all fiber patch cords tested before shipment?
A: Many production lines run end-of-line insertion-loss and end-face inspection on every finished connector, while return loss, geometry and mechanical tests may be performed per unit or on a qualified sampling basis. Ask which tests apply to every unit, which apply to a batch sample and what documentation is supplied.
Q: What insertion loss should a buyer specify?
A: For a factory-terminated single-mode connector, a buyer may request an insertion-loss target such as 0.20 dB typical with a defined maximum, subject to the approved datasheet and test method. Return loss is expressed as a positive magnitude; common project targets are RL ≥ 50 dB for UPC and RL ≥ 60 dB for APC. Always confirm wavelength, reference-cord method and pass/fail limits for the project.
Q: Why can a clean connector still fail?
A: A visual pass under a fiber microscope only confirms the end face is free of visible contamination and defects in the zones defined by IEC 61300-3-35. It does not measure insertion loss, return loss, or the sub-micron geometry -- radius of curvature, apex offset and fiber height -- that a 3D interferometer checks. A connector can look flawless and still fail an optical or geometric test, which is why visual inspection is a precondition for testing, not a substitute for it.
Q: Is 3D interferometer testing required for every assembly?
A: It's standard practice for factory-polished single-mode connectors, since geometry drives physical contact quality and long-term return loss stability. Some suppliers run it on 100% of connectors; others qualify a polishing batch and sample subsequent units. For high-reliability links such as 5G fronthaul, submarine backhaul or data-center trunk cabling, ask specifically whether 3D geometry data is available per unit or per batch.
Q: What information should be included in an RFQ?
A: At minimum: fiber type and mode (e.g., OS2 G.652D or G.657A2, OM3/OM4/OM5), connector type and polish on each end, simplex or duplex, jacket material and diameter, exact length with tolerance, environment (indoor/outdoor/plenum), and the acceptance criteria you require -- insertion loss and return loss limits, end-face grade, and whether a printed or digital test report ships with every unit