The Quick Answer
A reliable FTTH installation is built in four ODN layers: feeder, distribution, drop and subscriber. The feeder layer carries G.652D outdoor cable from the OLT side to a cabinet, splice closure or primary splitter. The distribution layer routes split fibers toward street boxes or building entry points. The drop layer uses G.657A2 bend-insensitive cable from the FDB or NAP to the premises. The subscriber layer finishes the link with a termination box, SC/APC pigtail, wall outlet and ONT patch cord.
For planning, treat the project as a sequence of engineering gates: route survey, civil preparation, feeder installation, splitter installation, distribution box setup, drop cable routing, subscriber termination and acceptance testing. Do not approve the link only because an ONT comes online. Acceptance should include connector inspection, bidirectional OLTS loss measurement, OTDR trace files and a documented optical budget.
Use this page as a technical procurement and deployment checklist. Values such as splitter loss, connector loss, IP rating and cable tensile load must still be confirmed against the actual product datasheet, local code and operator acceptance rules.
This guide was technically reviewed by Glory Optical's ODN product engineering and fiber optic QC review group. The review focused on passive ODN BOM structure, feeder and drop cable selection, PLC splitter planning, splice closure sealing, connector cleanliness and acceptance testing logic. It is based on Glory Optical product datasheet review, FTTH RFQ / BOM support experience and factory QC practice; it does not replace local operator acceptance rules or certified project design review.
FTTH Materials List: BOM by ODN Layer
A clear FTTH BOM should be organized by ODN layer, not by a generic product list. This makes it easier for procurement, installation and QA teams to check whether each cable segment, passive node and test step has the right component.

| ODN layer | Main components | Typical specification | Decision notes |
|---|---|---|---|
| Feeder OLT side to primary node | Outdoor feeder cable, dome splice closure, primary PLC splitter | G.652D, GYXTW / GYTA / ADSS, 12–144 fibers; IP67 or IP68 closure depending on exposure | Confirm route length, spare fiber count, closure capacity and whether the primary splitter sits in a cabinet or closure. |
| Distribution Primary node to FDB / building | Distribution cable, inline closure, fiber distribution box, optional secondary splitter | G.652D, 6–48 fibers; FDB with SC/APC adapters and splice tray | Match port count to subscriber density, reserve ports and future expansion. Use higher sealing protection in exposed or below-grade locations. |
| Drop FDB / NAP to premises | FTTH drop cable, clamps, entry grommet, drop termination box | G.657A2, 1–4 fibers, flat self-supporting or round duct type | Choose flat drop for common short aerial routes and round drop for ducts or protected underground routes. Verify tensile load and bend-radius limits. |
| Subscriber Premises entry to ONT | SC/APC pigtail, fiber wall outlet, ONT patch cord | OS2 / G.657A2, SC/APC, 1–3 m patch cord; indoor wall outlet or rosette | Protect connector endfaces until activation. Inspect and clean before mating to reduce activation faults. |
| Testing support | VFL, OLTS, OTDR, inspection scope, cleaning tools, labels and acceptance records | 1310/1550 nm test set; IEC 61300-3-35 inspection process; OTDR traces stored per span | Testing equipment is part of the deployment BOM, not an afterthought. Include labels and documentation templates before the field crew starts. |
ODN Architecture: Where Each Component Sits
The Optical Distribution Network is the passive path between the OLT and the ONT. A clean ODN design reduces field confusion because every component has a defined physical location, function and test boundary.

| Node | Function | Typical components | Quality checkpoint |
|---|---|---|---|
| OLT side / CO | Active equipment and feeder launch point | ODF, feeder patching, optical ports | Port mapping and transmit power record |
| Primary node | First passive split or major splice point | Cabinet, dome closure, PLC splitter | Splitter loss, input/output labeling, closure sealing |
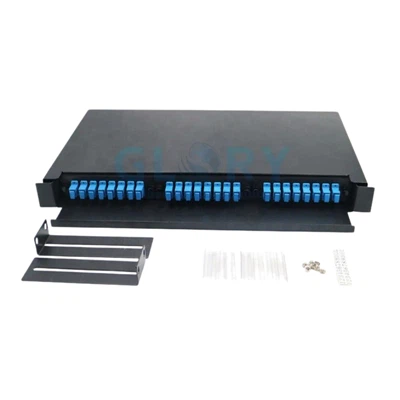
| Distribution point | Routes fibers toward subscriber clusters | FDB, NAP box, secondary splitter | Port assignment, splice tray routing, adapter cleanliness |
| Premises entry | Transitions from outdoor drop to subscriber side | Fiber termination box, pigtail, wall outlet | Bend radius, strain relief, connector inspection |
Single-stage vs two-stage split
In a single-stage design, one splitter, often 1:32, serves the subscribers directly from a cabinet or remote node. This simplifies records but concentrates split loss at one location. In a two-stage design, such as 1:8 followed by 1:4, splitting is divided across a primary node and a street or building-level FDB. Two-stage designs can simplify subscriber clustering and field expansion, but they add more physical nodes to document and test. The correct choice is a budget and operations decision, not only a product choice.
How We Define Technical Values in This Guide
FTTH design values are often mixed together in supplier articles. To avoid confusion, this guide uses four value types:
| Value type | Meaning | Example in this guide | How to verify |
|---|---|---|---|
| Standard-based value | A value or requirement derived from a recognized telecom or test standard. | ITU-T fiber categories, GPON / XGS-PON classes, IEC endface inspection framework. | Check the current ITU-T, IEC, TIA or local operator document. |
| Typical industry value | A common planning value used for early design or tender comparison. | Typical connector-pair loss, common split ratios, planning margin. | Replace with actual datasheet and test values before approval. |
| Glory Optical factory value | A value that may appear in Glory Optical product testing or datasheets. | Insertion loss, return loss, cable construction and closure rating. | Confirm against the latest product datasheet or pre-shipment test report. |
| Project-dependent value | A value that changes with route, climate, civil method, operator rules or local code. | Burial depth, aerial clearance, handhole sealing level, micro-trenching method. | Confirm with local regulations, operator standards and field survey. |
The field notes below are based on public technician and deployment discussions from Reddit and LinkedIn. They are used as practical reminders for planning and QA, not as statistical evidence or replacements for standards, datasheets or operator acceptance rules.
Fiber Types: G.657A2 vs G.652D
Fiber selection should follow the physical route. Use standard single-mode fiber where bends are controlled, and bend-insensitive fiber where the cable must pass through clamps, wall entries, rosettes or tight indoor routes.
| Fiber type | Where it fits | Why it is used | Design note |
|---|---|---|---|
| G.652D | Feeder and distribution cable | Standard single-mode fiber for controlled outdoor runs, ducts, aerial backbone and splice closures. | Do not route it through tight last-meter bends unless the cable and design specifically allow it. |
| G.657A2 | Drop cable, indoor lead-in, wall outlet routing | Bend-insensitive single-mode fiber for access routes where tight bends are likely. | Still protect the cable mechanically; bend-insensitive fiber is not permission to kink or crush the cable. |
Most elevated-loss complaints at the subscriber side are not caused by fiber type alone. They usually involve a combination of tight bends, poor strain relief, dirty connector endfaces or rushed activation. Cable choice helps, but installation discipline and inspection are still required.
Cable Selection by ODN Segment
Do not order one cable type for the whole network. Each segment has a different mechanical risk: tensile load in the feeder, sealing in the distribution point, bending at the drop, and handling damage inside the subscriber premises.
| Segment | Typical cable | Common use | Selection check |
|---|---|---|---|
| Feeder route | GYXTW / GYTA / ADSS outdoor cable | CO to cabinet, closure or primary splitter node | Fiber count, tensile rating, span design, duct condition and spare capacity. |
| Distribution route | Outdoor loose-tube distribution cable | Cabinet or closure to street-level FDB / building entry | Subscriber density, split plan, splice count and route protection. |
| Aerial drop | Self-supporting flat drop cable | Pole to premises or short overhead drop | Span length, wind load, clamp type, entry angle and sag. |
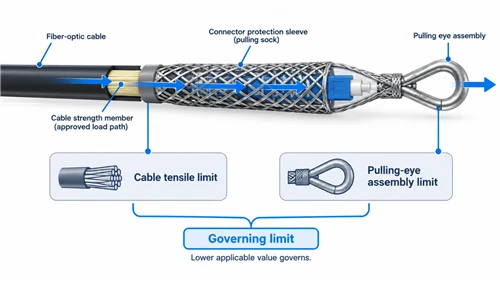
| Underground drop | Round drop cable in micro-duct or HDPE conduit | Pedestal or handhole to premises entry | Duct sealing, pulling tension, water blocking and bend protection. |
| Indoor subscriber side | G.657A2 indoor cable or patch cord | Termination box to wall outlet and ONT | Fire rating, bend control, connector protection and route aesthetics. |
7-Phase FTTH Deployment Steps
The deployment process below follows the physical build sequence. Each phase includes a goal, key actions, materials used and a QC checkpoint. This format is easier for field teams than a narrative-only installation guide.

Testing & Acceptance Checklist
Testing is the difference between a working link and an accepted network. A live ONT reading proves only that the link is currently working; it does not provide a baseline for future repair. Test each span and keep the records.

In public OTDR troubleshooting discussions, technicians often investigate a near-end reflective event as a possible OTDR port, launch-cable, bulkhead or first-connector cleanliness issue before assuming the installed cable is defective. Clean the OTDR port, both ends of the launch cable and the first connector pair, then retest with a suitable launch cable. Source: Reddit r/FiberOptics OTDR results discussion.
| Test step | Instrument | What it confirms | Acceptance logic | Action on fail |
|---|---|---|---|---|
| 1. Continuity check | VFL | Breaks, gross bends and wrong fiber route | No visible leakage or route mismatch | Repair bend or break; verify fiber assignment |
| 2. Insertion loss | OLTS / light source + power meter | Total end-to-end loss at project wavelengths | Loss stays within approved PON budget and margin | Isolate by segment; inspect connectors and splices |
| 3. Event trace | OTDR | Splice events, connector events, bends and fiber attenuation | Events match the route map and operator thresholds | Re-splice, re-clean, replace connector or correct bend |
| 4. Connector inspection | Inspection scope | Endface contamination, scratches and ferrule defects | Pass according to project inspection criteria | Clean and re-inspect; replace damaged connector |
| 5. Documentation | Acceptance report | Traceability for future service calls | Records match physical labels and port plan | Correct records before handover |
Dirty connectors are one of the most common field activation issues reported by installation teams. OTDR and OLTS readings may show the extra loss, but they do not identify endface condition directly. Inspect-clean-inspect remains the safest workflow before final mating.
Optical Power Budget: GPON and XGS-PON
The optical budget is the allowed loss between the OLT and ONT. It must cover fiber attenuation, splitter loss, connector pairs, splices and design margin. Use the table below as a planning framework only; final design must use OLT/ONT datasheets and the selected splitter specification.
| System | Common budget class | Planning use | Important limitation |
|---|---|---|---|
| GPON | Class B+ / C+ depending on equipment | Common residential and small-business FTTH design | Actual transmit power, receiver sensitivity and operator margin rules vary by equipment. |
| XGS-PON | N1 / N2 depending on equipment | 10G symmetric access network upgrade or new build | The passive ODN may be reusable, but budget and coexistence planning still require device verification. |
Worked example only: 10 km GPON with 1:32 split
| Loss item | Planning calculation | Example value | Value type |
|---|---|---|---|
| Fiber attenuation | 10 km × 0.35 dB/km | 3.5 dB | Typical planning value |
| 1:32 splitter | Use selected splitter datasheet | ~17.5 dB | Typical industry value |
| Connector pairs | 4 pairs × 0.4 dB/pair | 1.6 dB | Conservative planning value; actual cleaned SC/APC pairs may test lower and must be verified by OLTS / project acceptance testing |
| Fusion splices | 6 joints × 0.05 dB | 0.3 dB | Typical value; verify by OTDR / splice record |
| Total calculated loss | 22.9 dB | Example only | |
| Design margin | Budget minus calculated loss | Confirm per project | Project-dependent |
The 0.4 dB per connector pair used above is a conservative planning allowance for early margin screening, not a guaranteed product limit. Properly cleaned and inspected SC/APC connections may measure lower, but field conditions, adapter quality, mating cycles and installation handling can increase loss. Use OLTS results, connector inspection and the selected adapter / patch cord datasheets for final acceptance.
Field Safety and Local-Code Checks
This section is intentionally short because FTTH installation safety is governed by local law, operator rules and site conditions. Use it as a reminder checklist, not as a legal standard.
- Confirm dead-fiber status before looking at or working near a fiber end. Infrared light is invisible.
- Dispose of glass fiber scraps in a controlled container or sticky mat; do not leave bare fiber shards in the work area.
- Use proper PPE for cutting, splicing, aerial work and confined or below-grade spaces.
For US projects, utility location, aerial clearance, confined-space and fall-protection rules may require 811,
NESC and
OSHA checks.
- For other regions, replace US references with local telecom, electrical and civil-work requirements.
Common FTTH Installation Mistakes
The most expensive FTTH faults are not always caused by failed products. Many come from route stress, missing records or dirty interfaces. These are the issues to check before handover.
LinkedIn FTTH field discussions frequently point back to physical-layer checks: dirty connectors, tight bends, loose interfaces, low RX optical power and damaged patch cords. Before escalating a subscriber issue to configuration or routing, verify connector cleanliness, bend stress, patch-cord condition, splice points and optical levels. Source: LinkedIn FTTH Layer 1 troubleshooting discussion.
| Mistake | Why it matters | Prevention |
|---|---|---|
| Skipping baseline OTDR traces | Future faults become difficult to compare against the original installation. | Save bidirectional traces per span during acceptance. |
| Using the wrong fiber for tight drop routes | Standard fiber can suffer bend-related loss in wall entries and rosettes. | Use G.657A2 drop cable where tight bends are expected. |
| Overloading the optical budget | High split ratio, long route and too many connectors can remove system margin. | Calculate loss before ordering splitters and confirm after installation. |
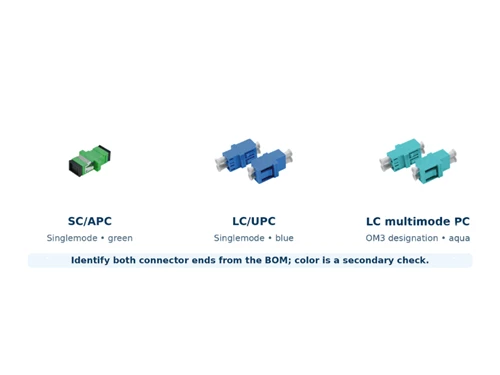
| Poor connector cleanliness | Contamination can create avoidable insertion loss and unstable activation. | Inspect-clean-inspect every connector before mating. |
| Weak labeling and port records | Service calls take longer and wrong-subscriber connections become more likely. | Match physical labels, splitter ports, OTDR files and subscriber records. |
FAQ
Q: What equipment is needed for FTTH installation?
A: A practical FTTH installation kit includes outdoor feeder or distribution cable, G.657A2 drop cable, PLC splitters, splice closures, fiber distribution boxes, termination boxes, SC/APC pigtails, wall outlets, patch cords, fusion splicer, cleaver, one-click cleaner, inspection scope, OLTS and OTDR. The exact list depends on route length, split ratio, mounting environment and whether the project uses aerial, duct, micro-duct or below-grade handhole deployment.
Q: What is a complete FTTH BOM for an ODN project?
A: A complete FTTH ODN BOM normally includes feeder cable and splice closures, distribution cable and FDBs, drop cable and termination boxes, subscriber pigtails and wall outlets, plus test equipment and labels. For procurement, group the BOM by ODN layer: feeder, distribution, drop and subscriber. Add spare ports, slack length, splitter ratio, IP rating and connector type before ordering.
Q: What drop cable should be used for FTTH?
A: For most subscriber drop segments, use G.657A2 bend-insensitive single-mode drop cable. It is better suited to wall entries, clamps, rosettes and indoor routing than standard G.652D fiber. Flat self-supporting drop cable is common for short aerial spans, while round drop cable is usually preferred for ducts, micro-ducts and protected underground routes. Always check the cable datasheet for tensile load and minimum bend radius.
Q: What splitter ratio is common for GPON FTTH?
A: 1:32 is a common GPON split ratio because it balances port utilization, reach and optical budget in many access networks. 1:64 can be used where the OLT/ONT class, route length and connector count leave enough margin. Two-stage designs such as 1:8 + 1:4 are often used to distribute subscribers across cabinets, street boxes or building entry points. Always calculate the full link budget before finalizing the ratio.
Q: How much optical loss is acceptable in FTTH?
A: Acceptable optical loss depends on the PON class and system margin. As a design rule, calculate fiber attenuation, splitter loss, connector loss, splice loss and a reserve margin before deployment. GPON Class B+ is commonly designed around a 28 dB budget, but the project should still keep margin for aging, repair splices and temperature variation. The worked example in this guide is for planning only, not a substitute for device datasheets.
Q: What tests are required before FTTH handover?
A: Before handover, test each span with VFL continuity check, bidirectional OLTS insertion-loss measurement, OTDR trace recording, connector endface inspection and documentation review. The acceptance file should include loss reports, OTDR traces, port-to-subscriber records, splitter assignments and any remediation notes. Do not accept only a live ONT reading; it does not provide a reliable baseline for future fault isolation.
Q: What is the difference between G.657A2 and G.652D fiber in FTTH?
A: G.652D is the standard single-mode fiber widely used in feeder and distribution cables where bends are controlled. G.657A2 is bend-insensitive single-mode fiber intended for access, drop and indoor routes where tighter bends occur. In FTTH design, a common approach is to use G.652D in the feeder and distribution network, then use G.657A2 from the FDB or termination point to the subscriber premises.
Q: How do I choose a fiber termination box for FTTH?
A: Choose a fiber termination box by port count, splice capacity, adapter type, mounting method and environment. A single home may need a 1–2 port SC/APC box, while a corridor, pole or MDU entry point may require 4–12 ports or more. Outdoor boxes need suitable IP protection, cable strain relief, splice tray space and bend-radius control. Below-grade or flood-prone locations usually require a higher sealing level than sheltered wall installations.
Recommended ODN Components by Layer
The article above explains the engineering sequence. The product selection below is intentionally grouped by layer so procurement teams can convert the design into an RFQ or BOM without turning the guide into a product catalogue.
Outdoor Fiber Cable + Splice Closure
Use outdoor feeder cable and sealed splice closures for backbone ODN routes. Confirm fiber count, tensile rating, closure capacity and IP rating before procurement.
View splice closuresFDB / NAP Box + PLC Splitter
Use fiber distribution boxes and PLC splitters to manage subscriber clusters. Confirm split ratio, adapter type, port count and spare capacity.
View PLC splittersG.657A2 Drop Cable + Termination Box
Select flat or round drop cable according to aerial, duct or wall-entry conditions. Pair it with a termination box that supports strain relief and bend control.
View FTTH drop cablePigtail + Wall Outlet + Patch Cord
Use SC/APC pigtails, indoor wall outlets and short patch cords to finish the ONT-side connection. Keep interfaces capped until inspection and activation.
View wall outletsStandards & References
The following references are listed to help engineers verify the values used in design, testing and procurement. Always check the current edition and the operator's local acceptance rules before final approval.
| Reference | Why it matters in FTTH |
|---|---|
| ITU-T G.652 | Standard single-mode fiber characteristics used in feeder and distribution planning. |
| ITU-T G.657 | Bend-insensitive single-mode fiber categories used in access and drop cable routes. |
| ITU-T G.984.1 | GPON general characteristics for optical access networks. |
| ITU-T G.9807.1 | XGS-PON system reference for 10-Gigabit-capable symmetric PON. |
| ITU-T G.671 | Optical component characteristics relevant to passive devices such as splitters. |
| IEC 60529 / IP ratings | Ingress protection classification for boxes, closures and enclosures. |
| IEC 61300-3-35 | Connector endface inspection and pass/fail criteria; use the current edition or operator-specified inspection standard. |
| TIA-526 / IEC 61280-4-1 | Installed fiber cabling attenuation and optical loss measurement procedures. |
About Glory Optical: Ningbo Glory Optical Communication Co., Ltd. supplies FTTH / FTTx passive optical components including fiber termination boxes, splice closures, PLC splitters, pigtails, patch cords, drop cables and ODN accessories. Product values in this article should be confirmed against the latest datasheet or project-specific RFQ.
Technical review note: The review was performed internally by Glory Optical's ODN product engineering and fiber optic QC review group. The reviewer scope covered passive ODN component selection, datasheet consistency, connector-cleanliness risk, closure sealing logic and acceptance-test workflow. Glory Optical is also a product supplier, so product recommendations should be treated as RFQ support rather than independent certification.
Document note: This guide is for technical planning and procurement support. It does not replace local codes, operator standards, certified design review or product-specific installation instructions.
Community note: Reddit and LinkedIn references in field notes are anecdotal public discussions. They are included to illustrate common field concerns, not to define pass/fail thresholds or product specifications.